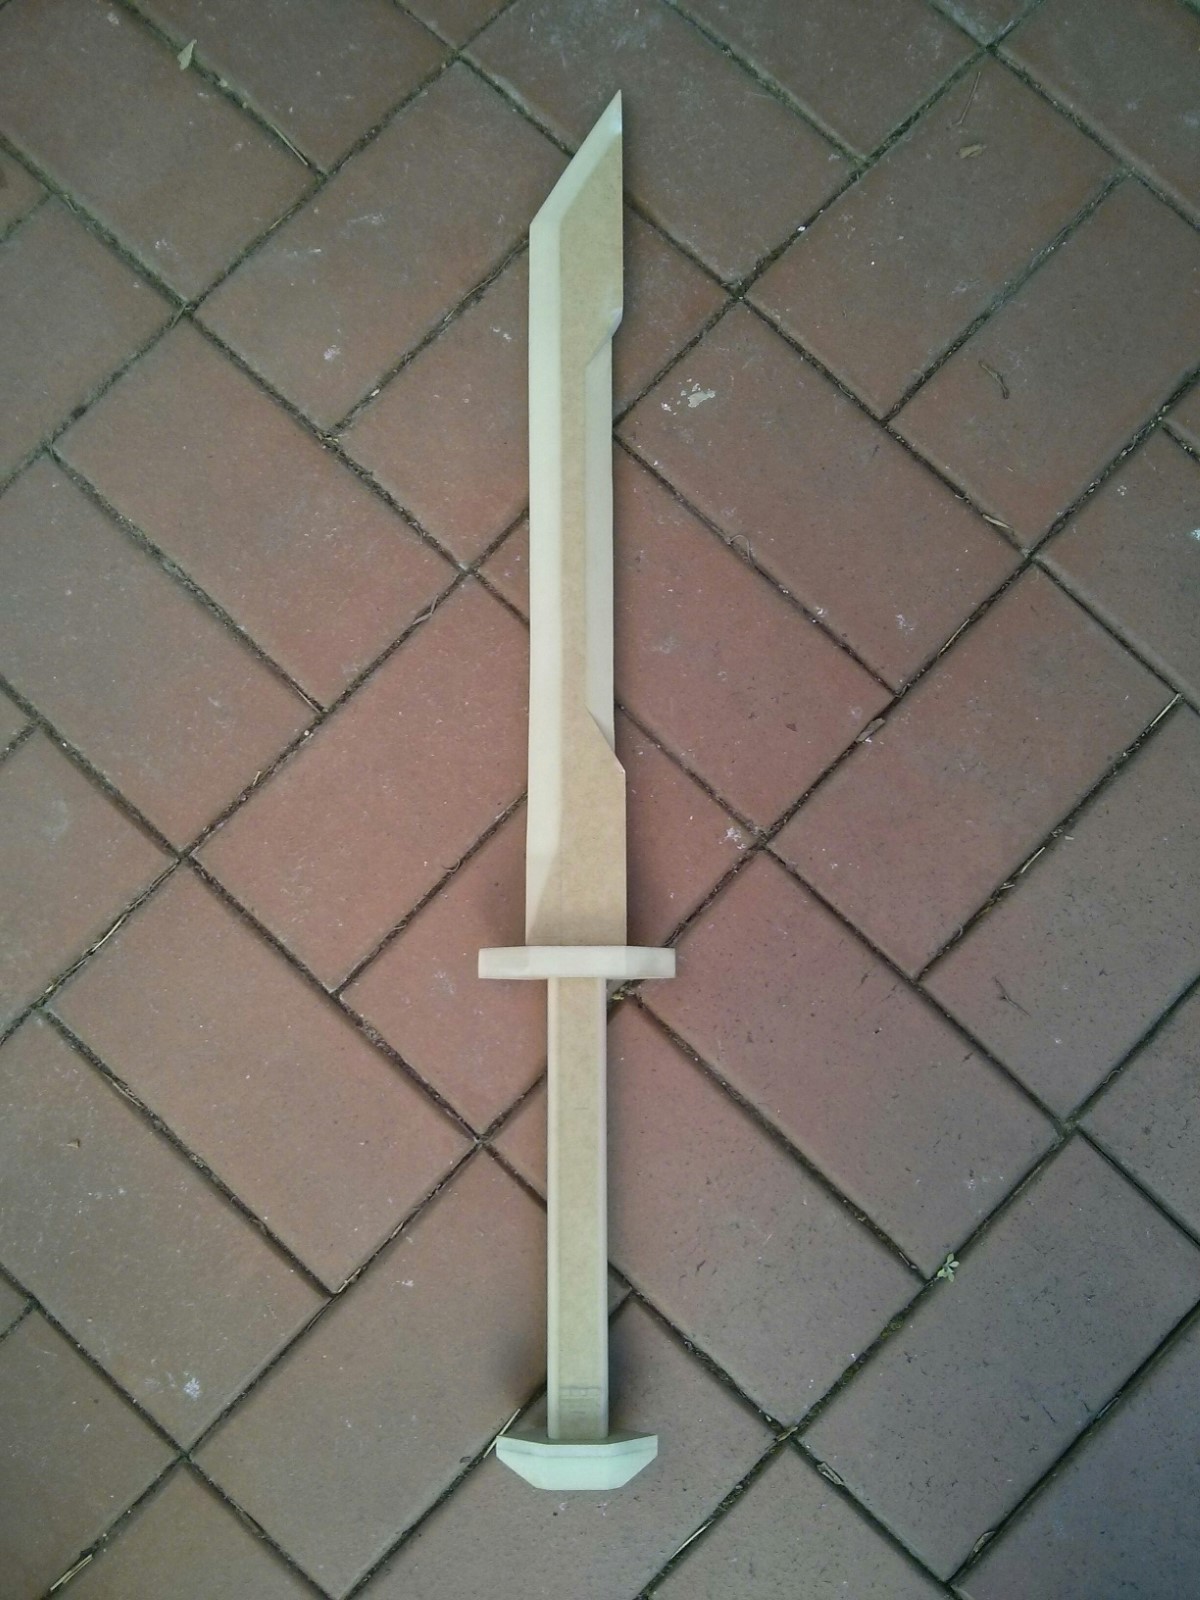
My sword
Some years back I decided it would be cool to build a sword, so I did. I don't have any blacksmithing skills, so instead of using metal I used the obvious alternative: medium-density fibreboard.
Shaping the MDF
I came up with a design and cut out a piece of MDF with the outline:
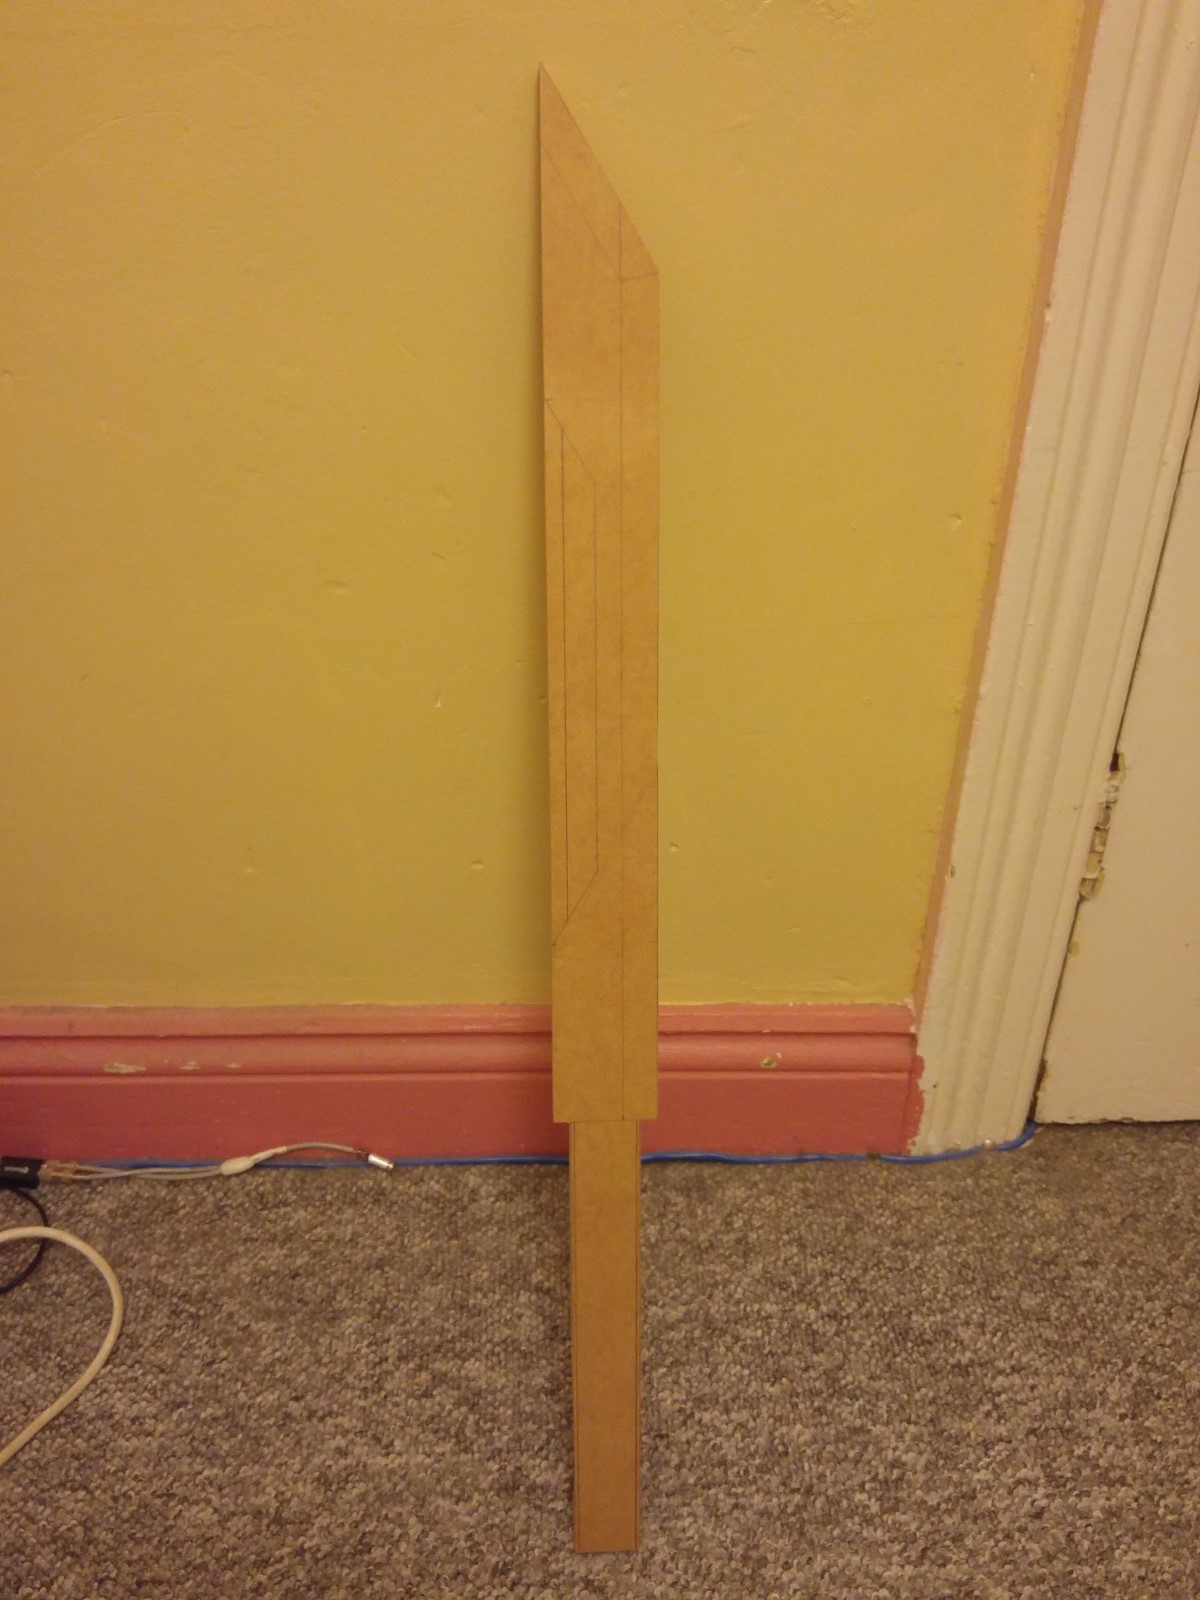
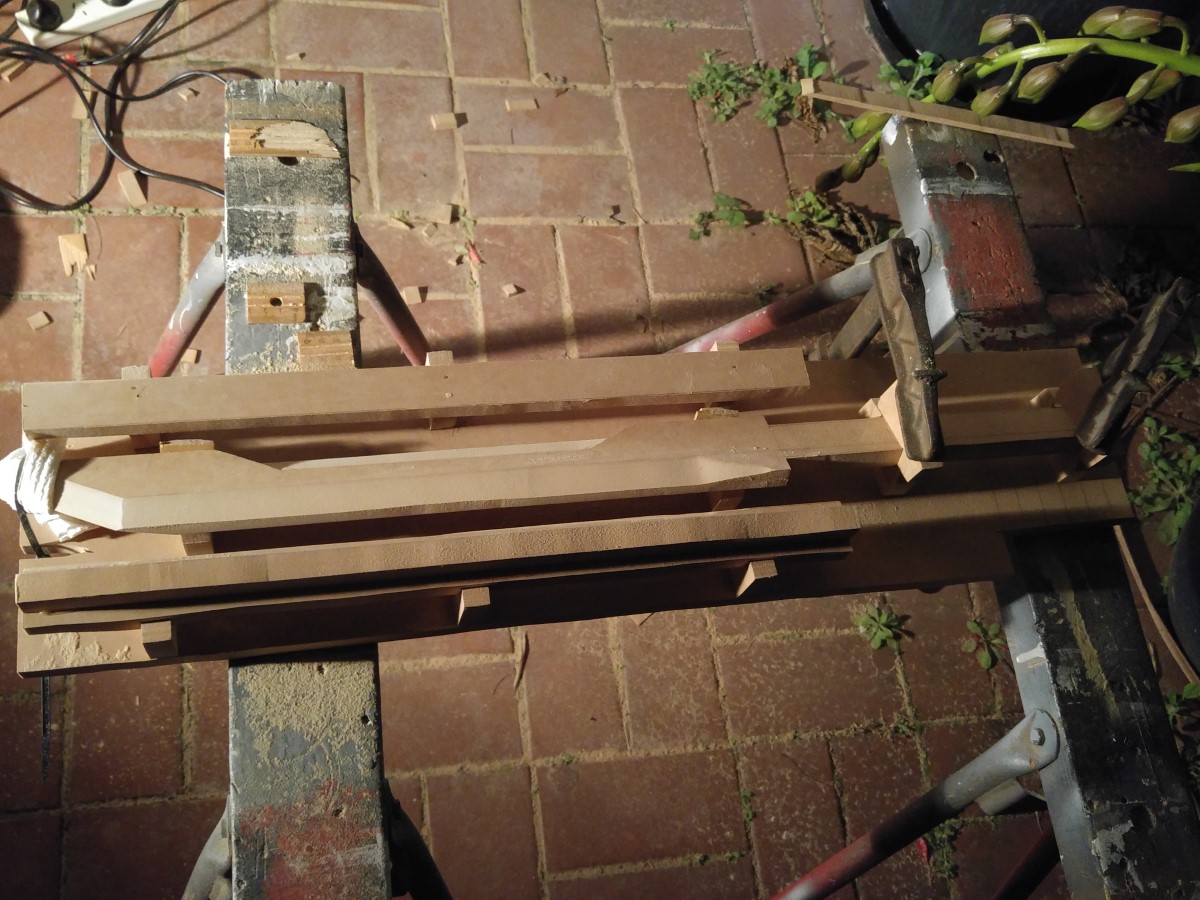
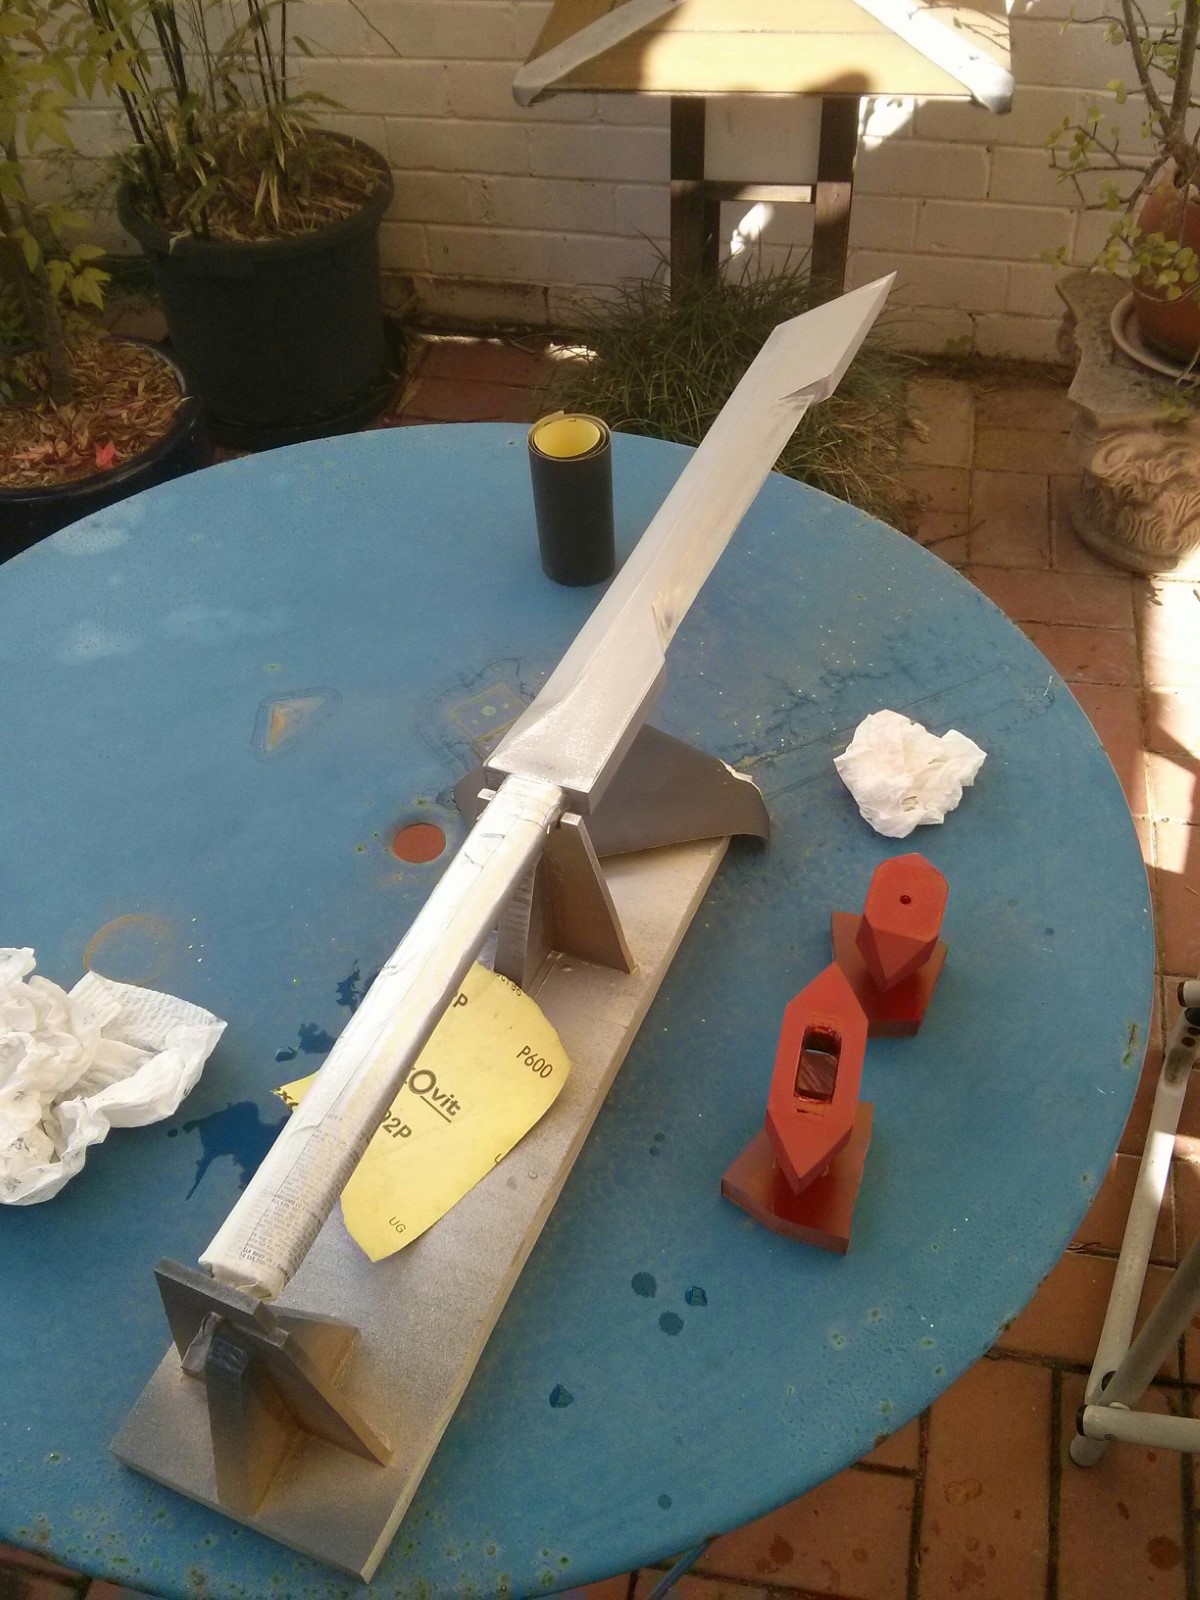
I didn't have a lot of power tools on hand. The only thing I had for creating the blade edge was a handheld belt sander. I knew that sanding it straight would be almost impossible to do by hand, and any imperfection would stick out.
So I built this jig:
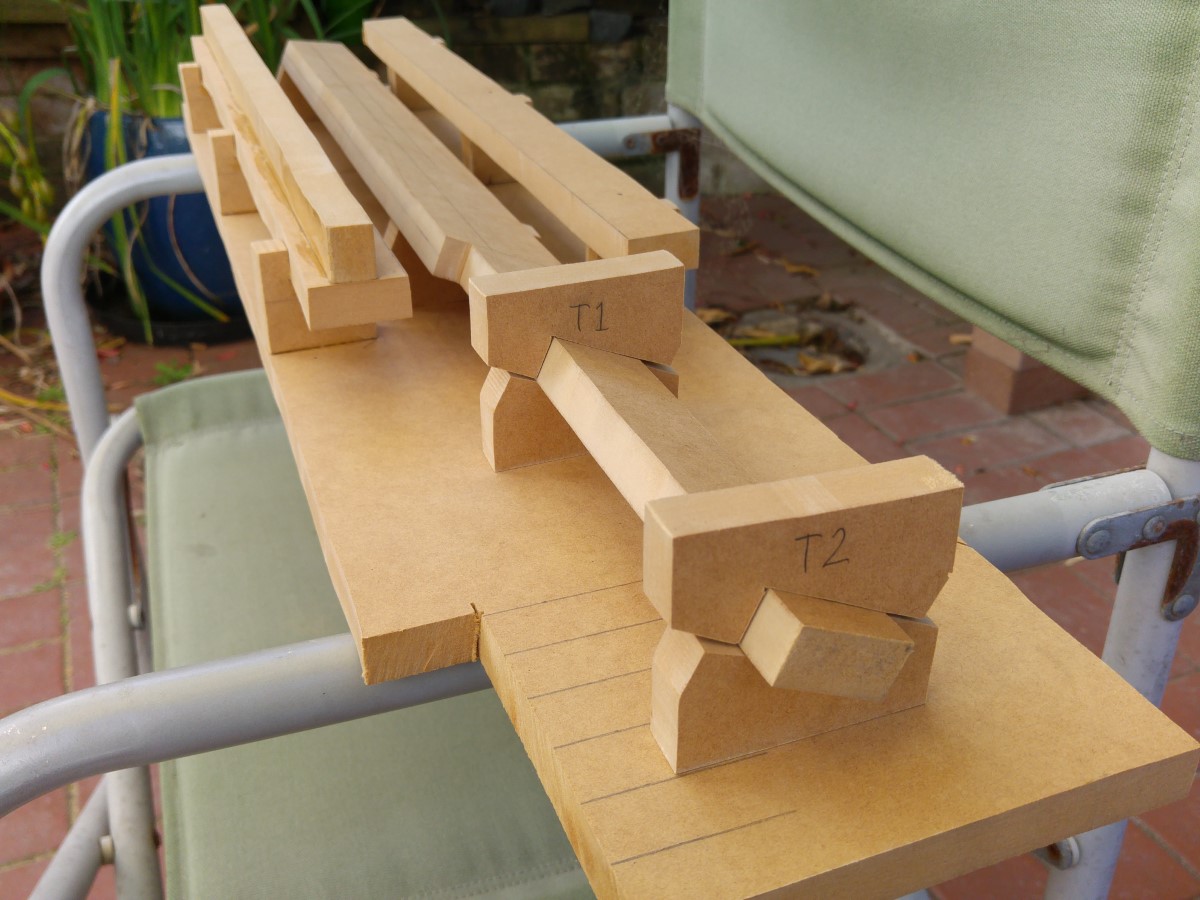
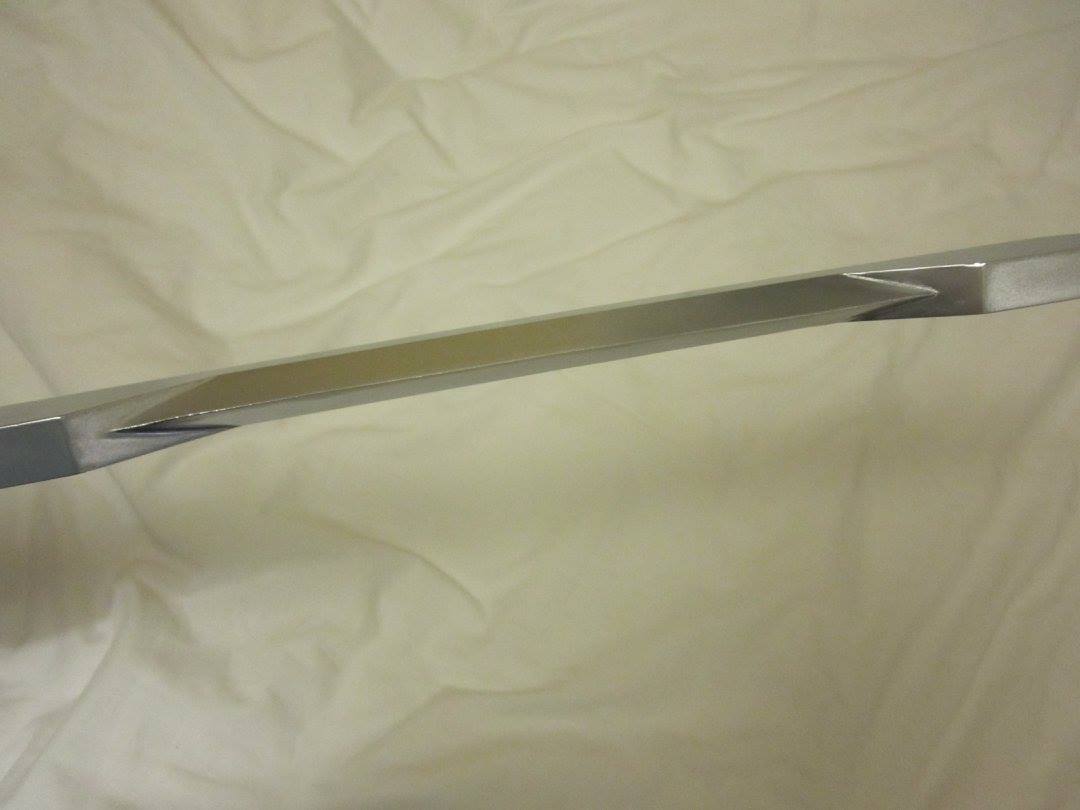
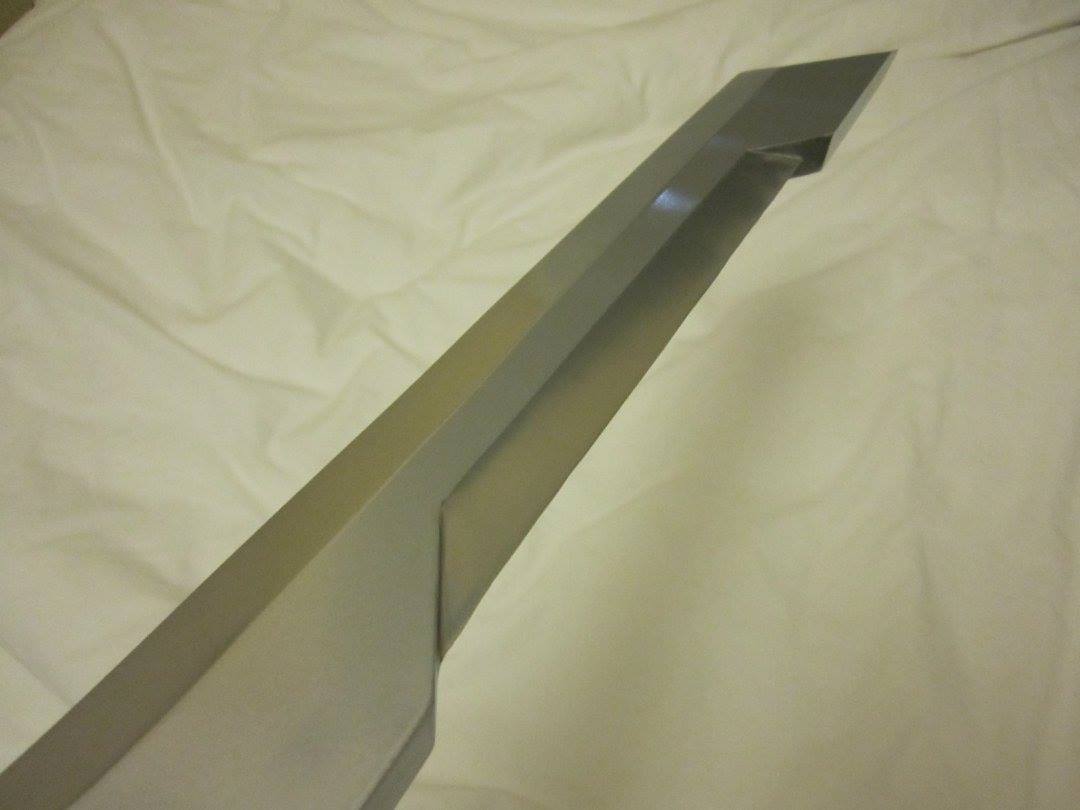
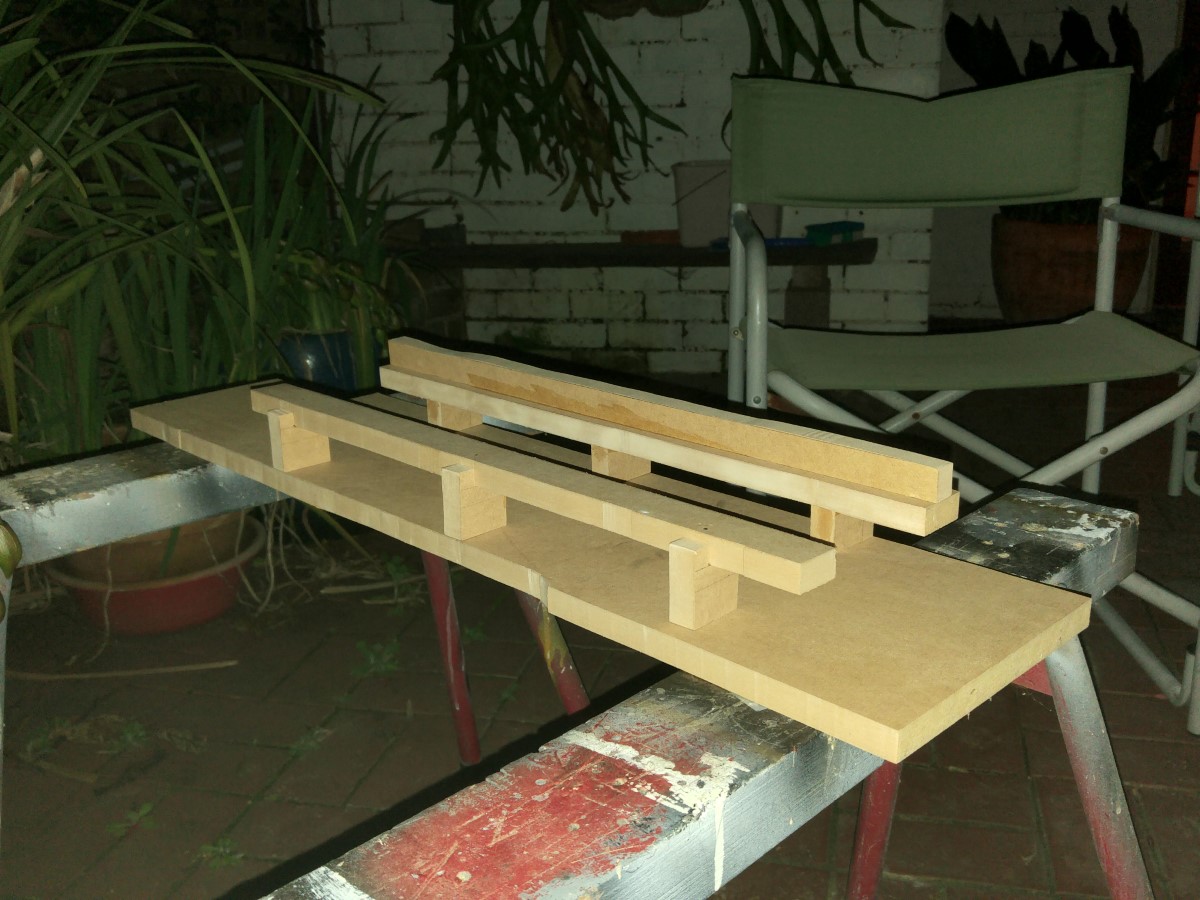
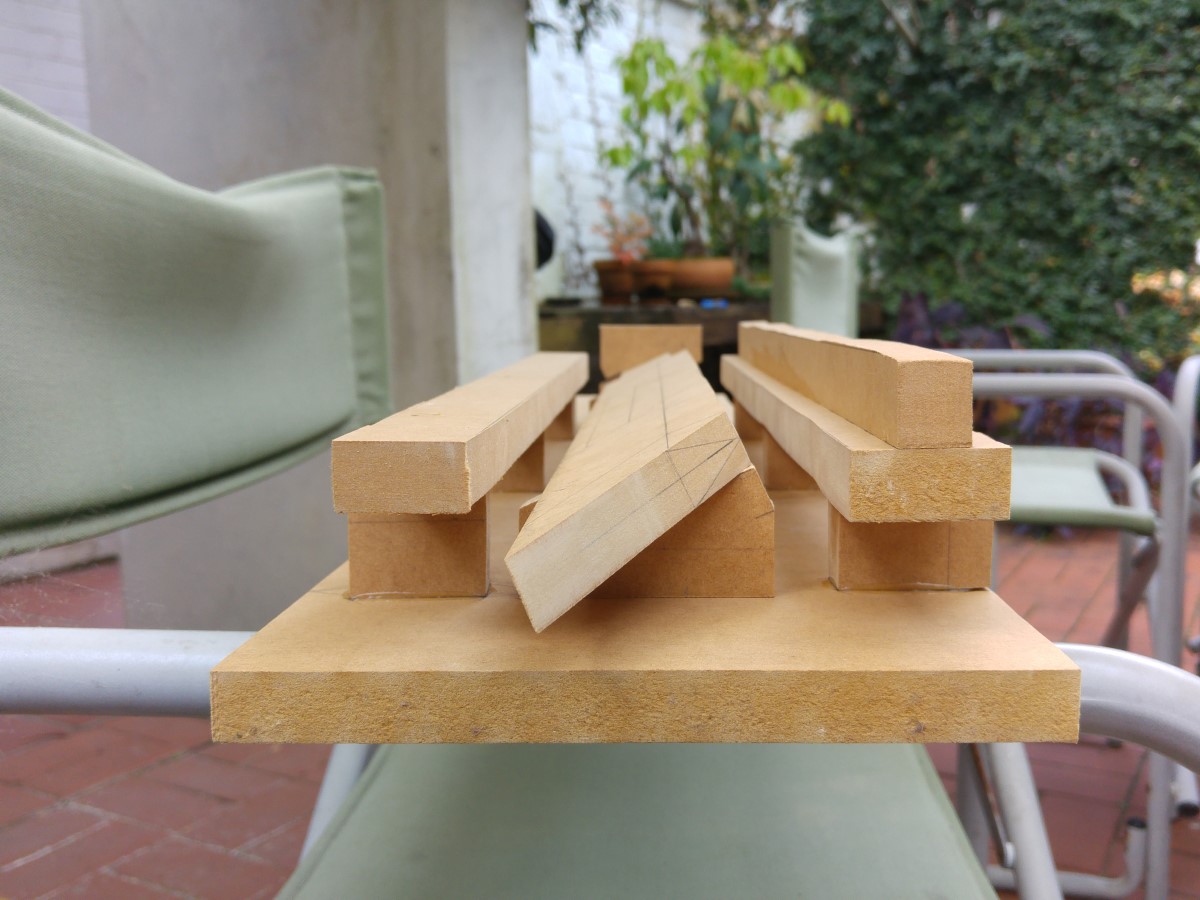
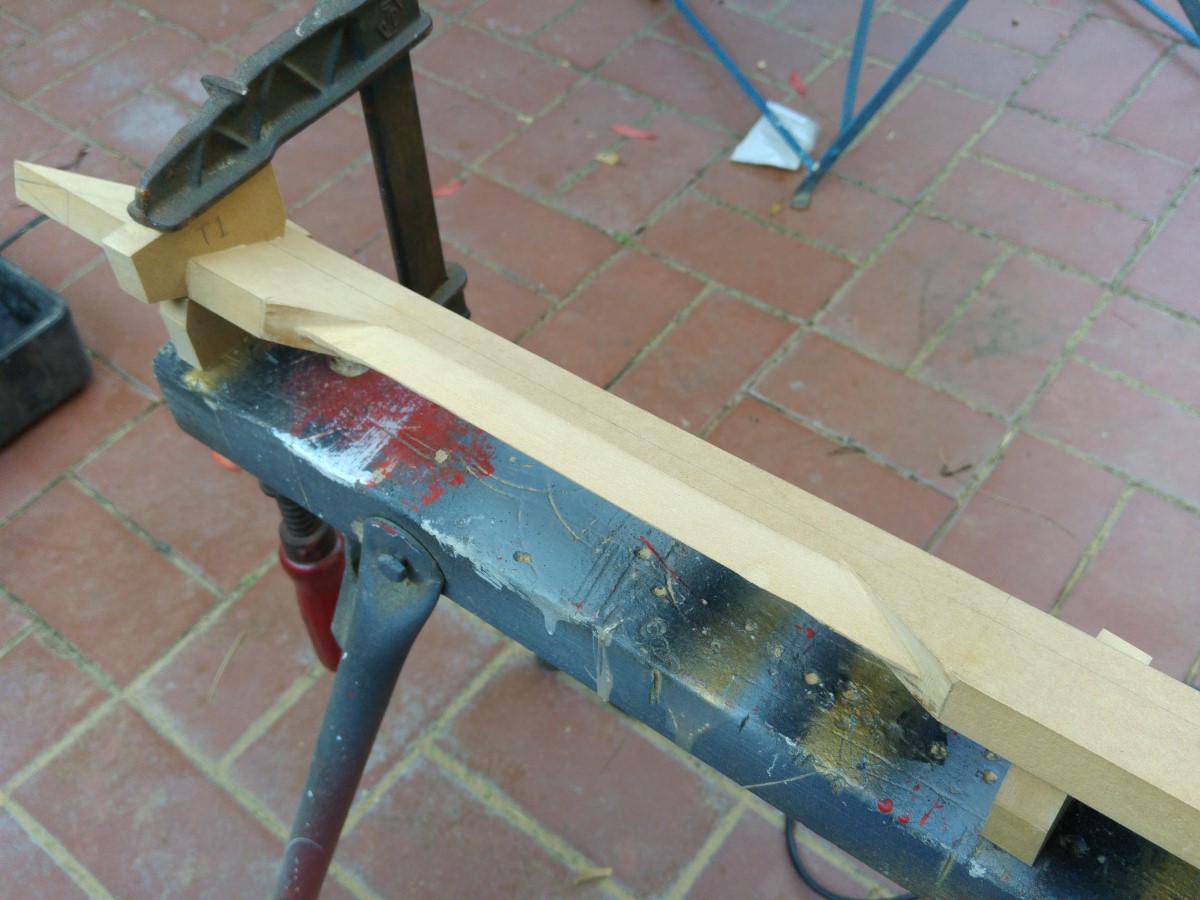
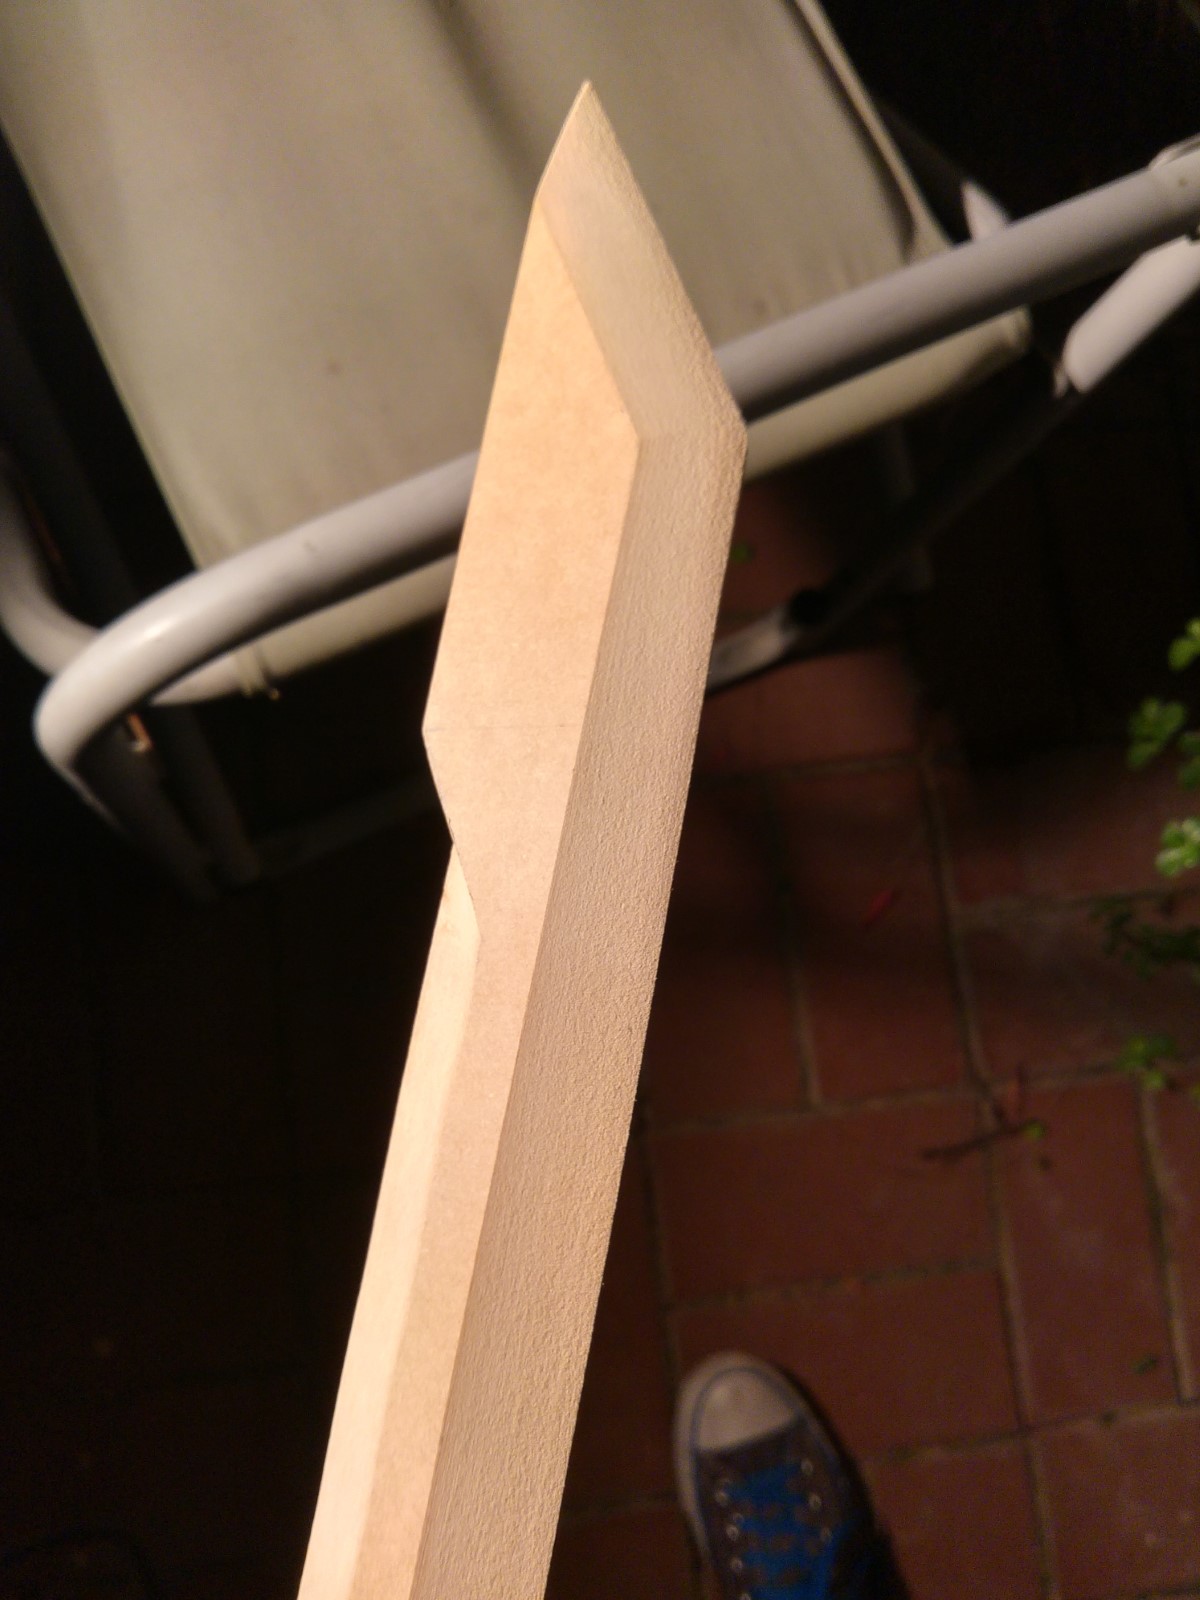
The sander would sit on the two rails and I could run it straight along the blade. More angles here and here. It turned out well:
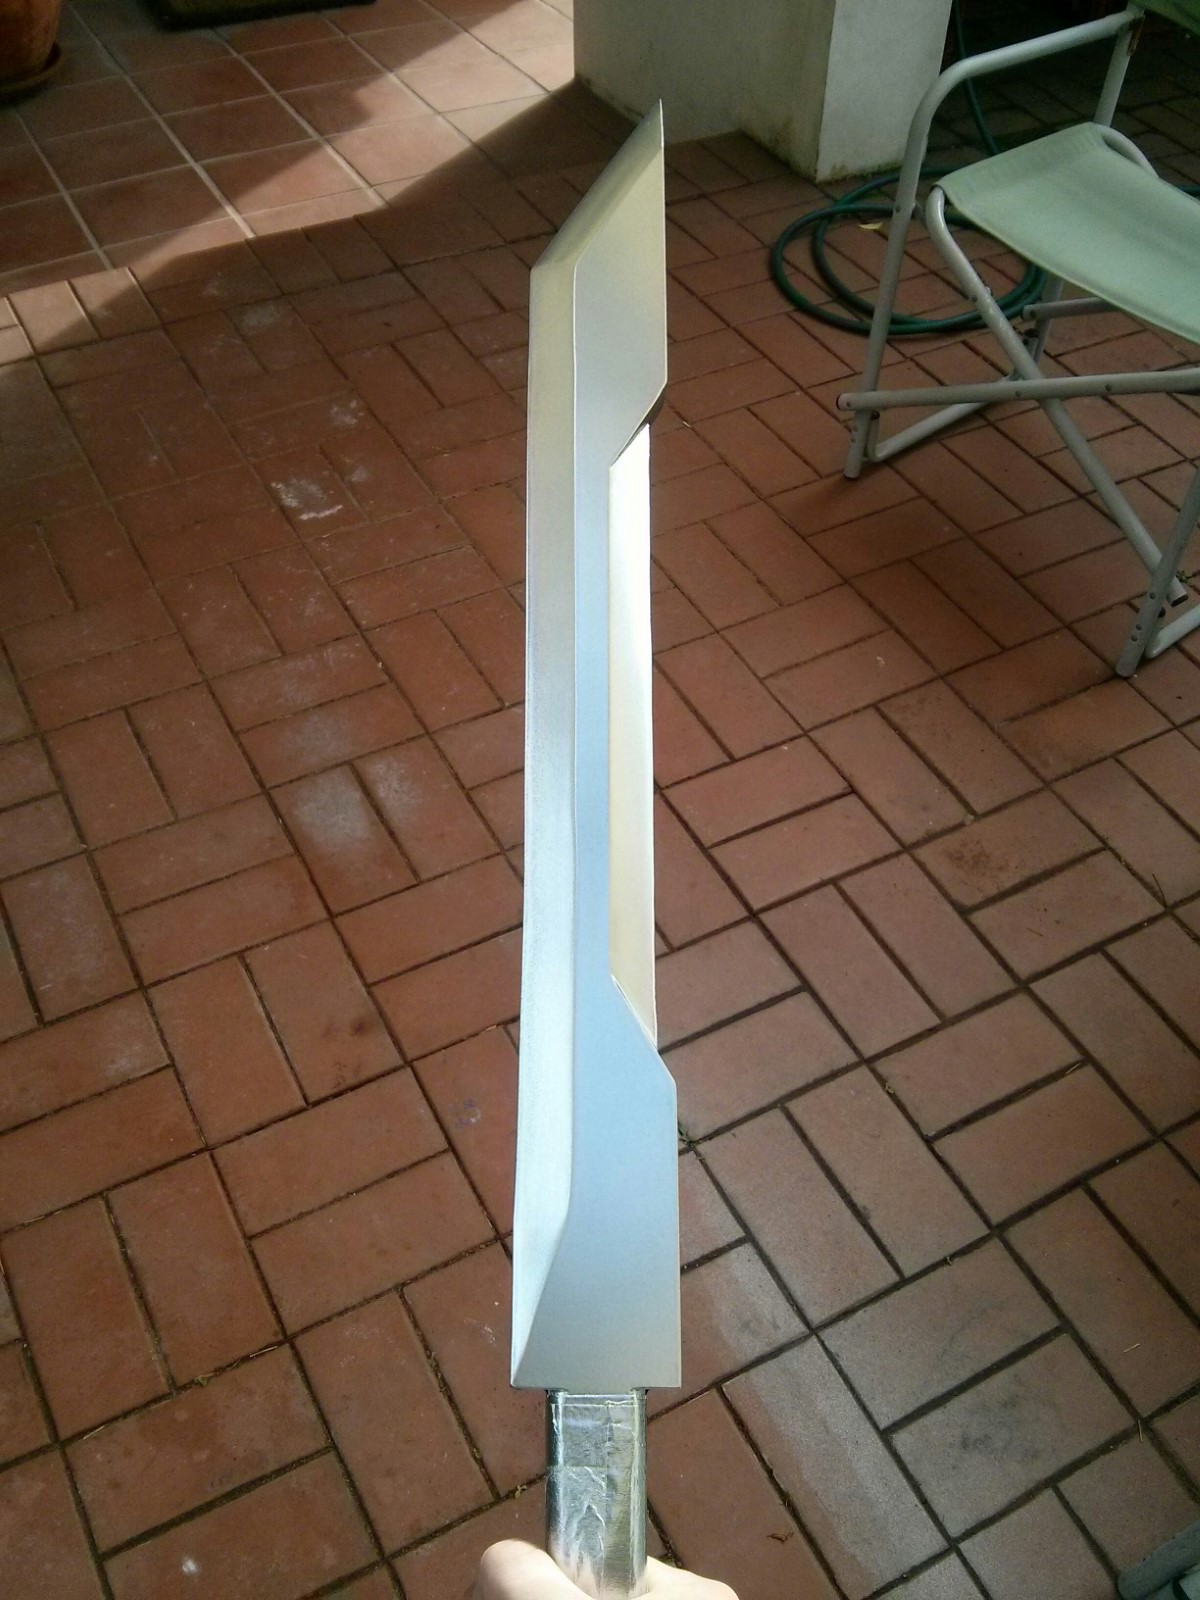
The taper at the bottom of the blade was just because of the shape the sanding belt makes, but it works well. You can also see the end of the blade sanded here. It wasn't practical to make a jig for doing those parts, so I did them freehand. Another angle here.
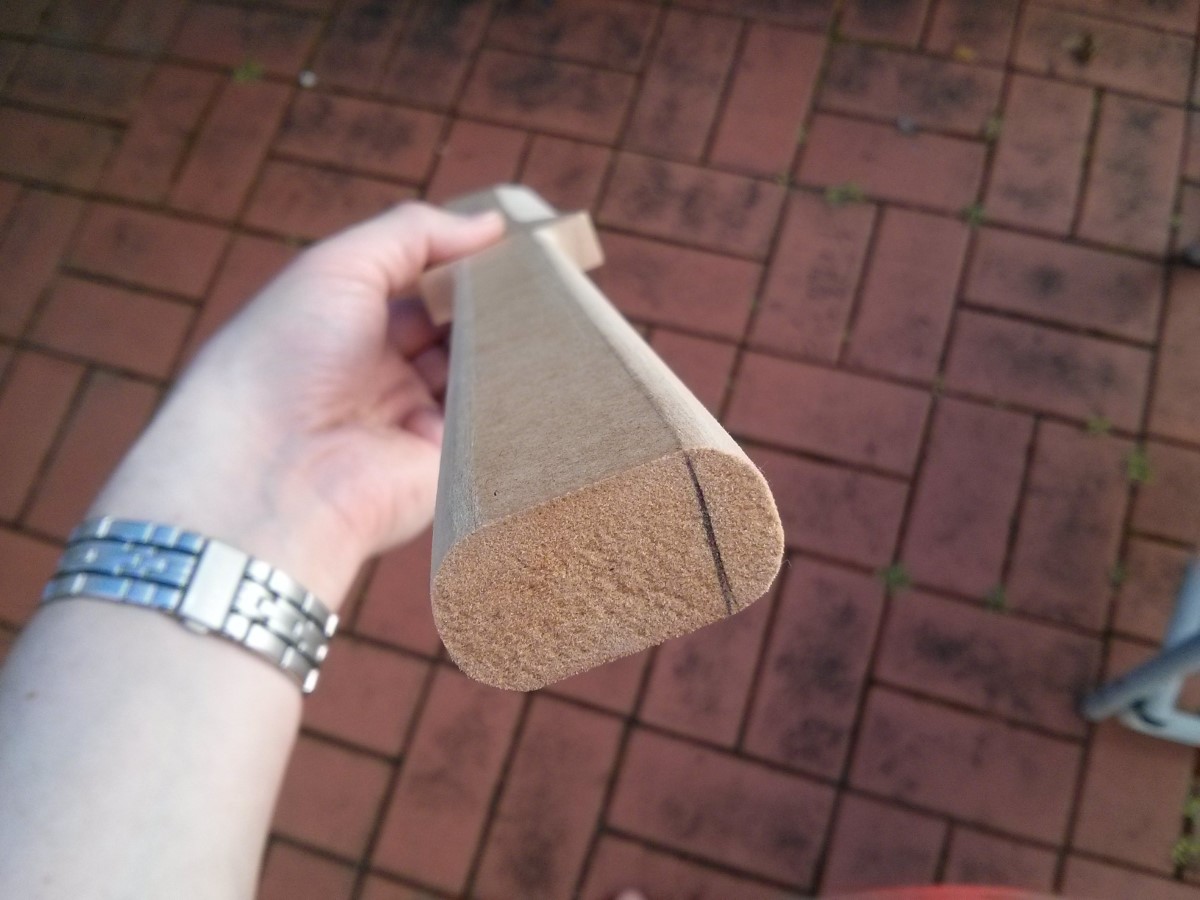
You can also see here the back section which I cut out. Just a decorative detail.
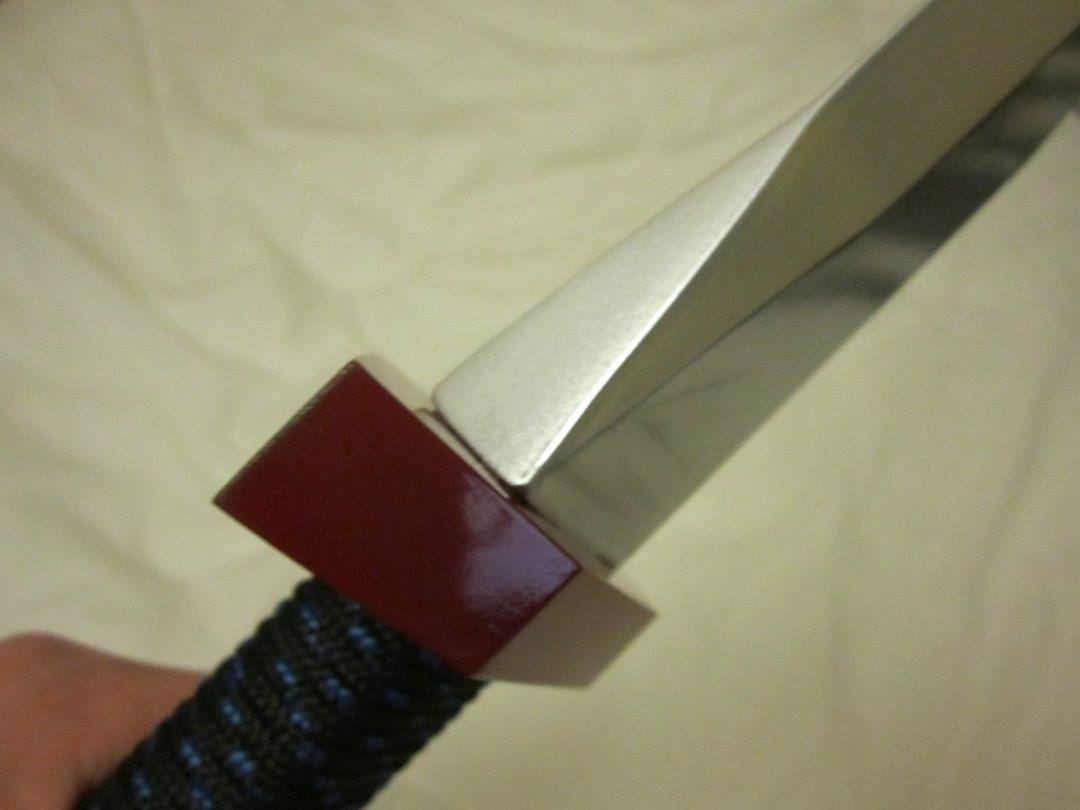
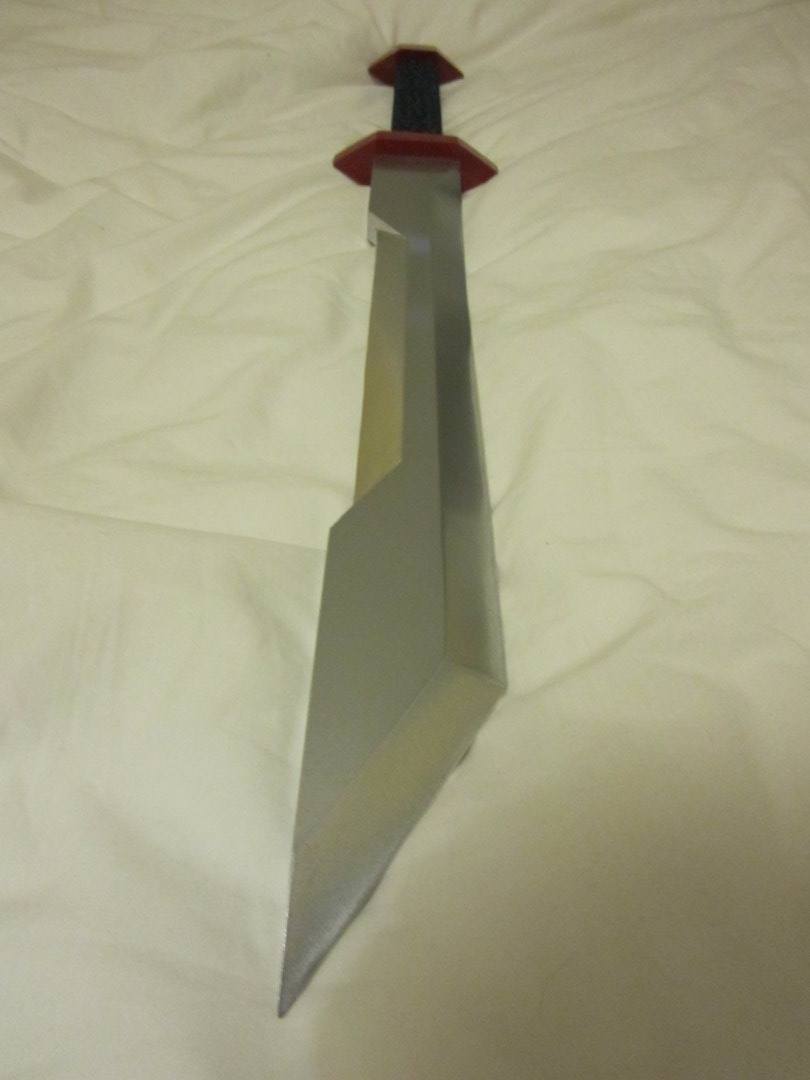
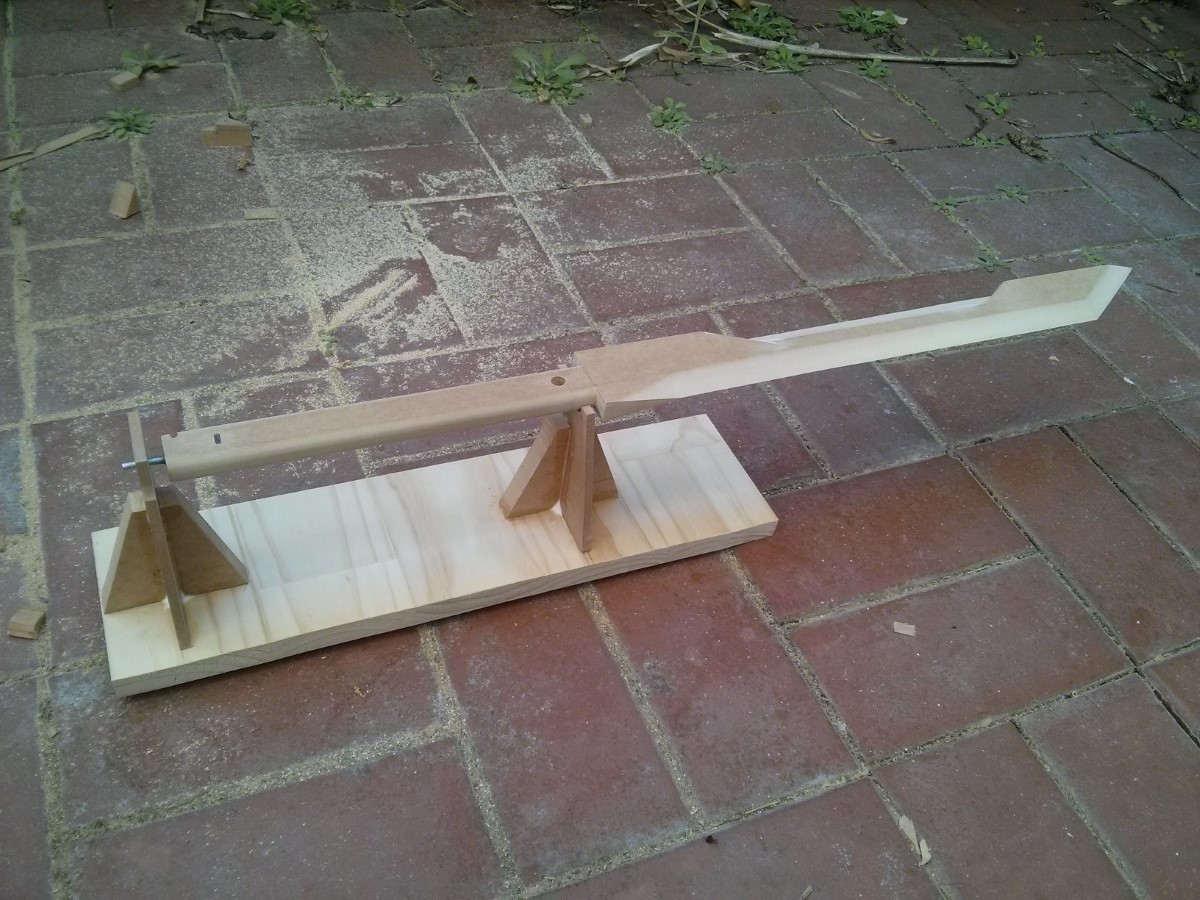
Next I rounded the hilt to a nice comfortable shape. I also made a hand guard and pommel, shown here about to be painted. Here are all the MDF parts assembled for the first time:
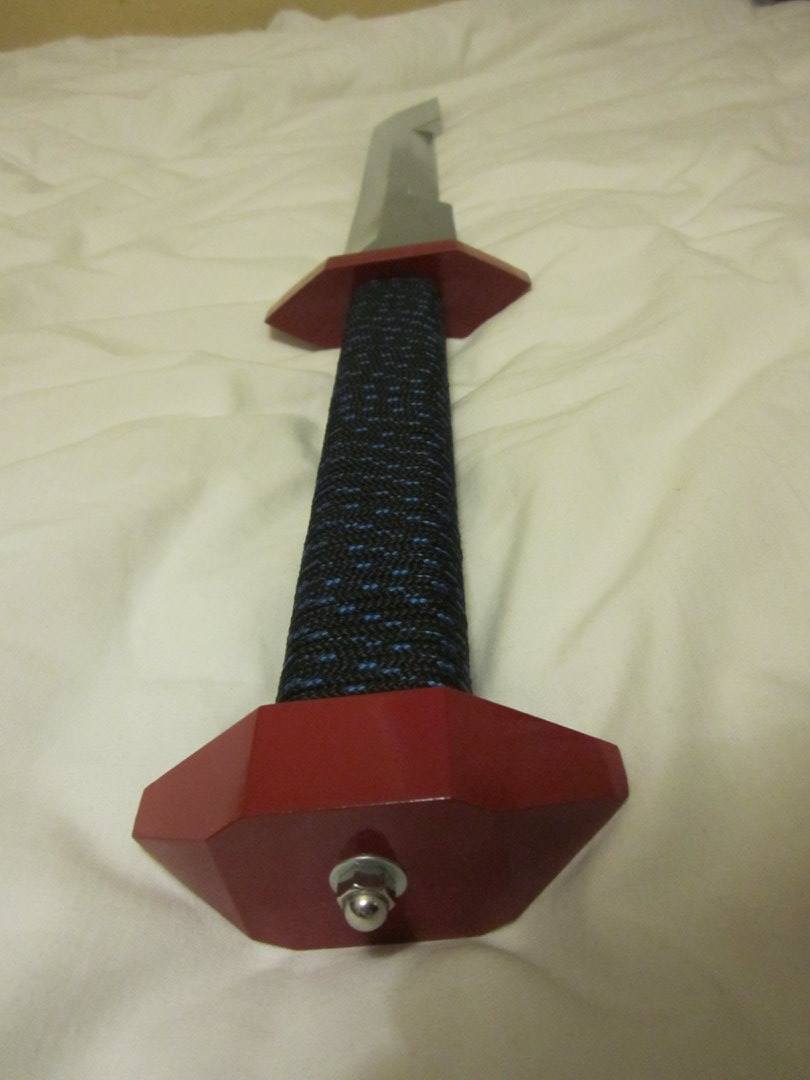
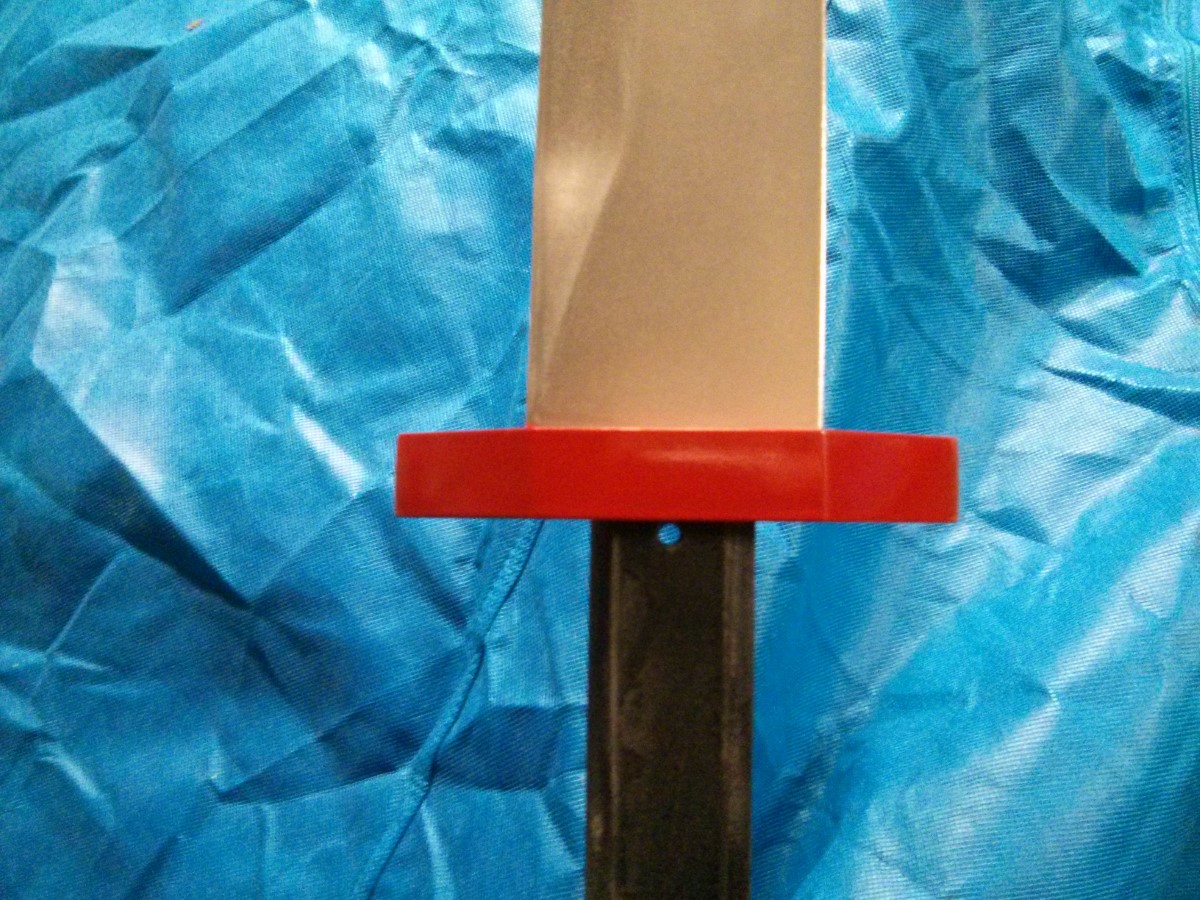
The pommel assembly, and the plan for wrapping the hilt
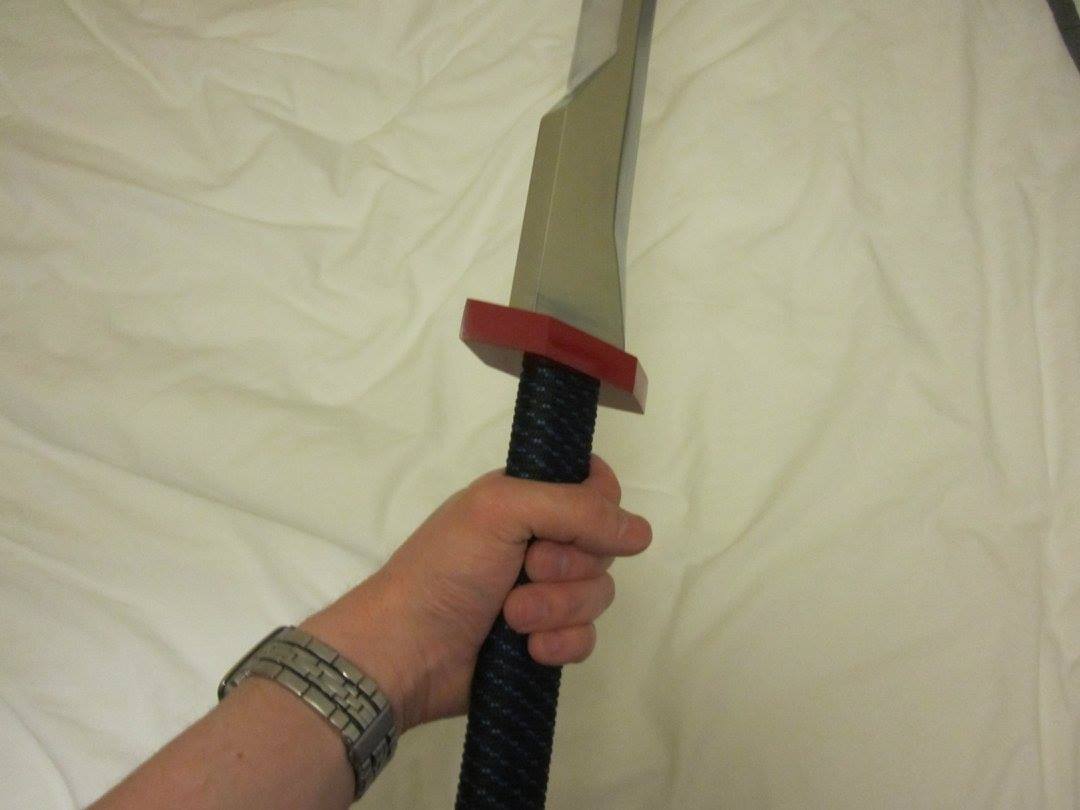
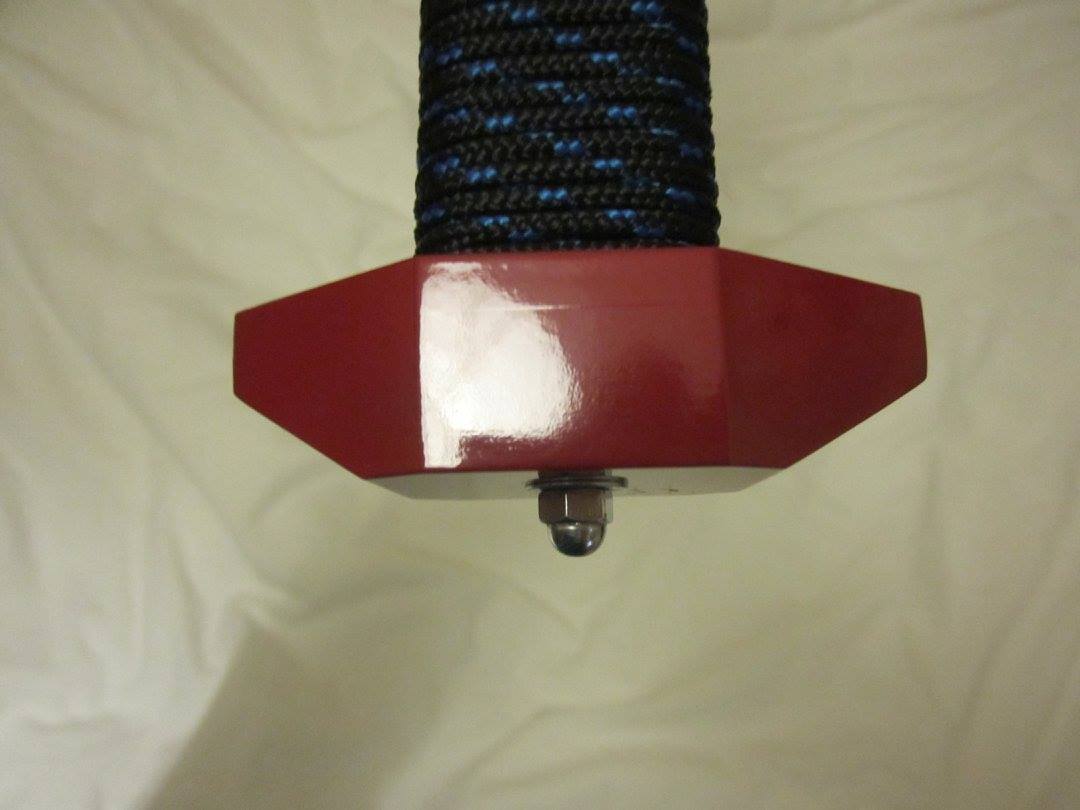
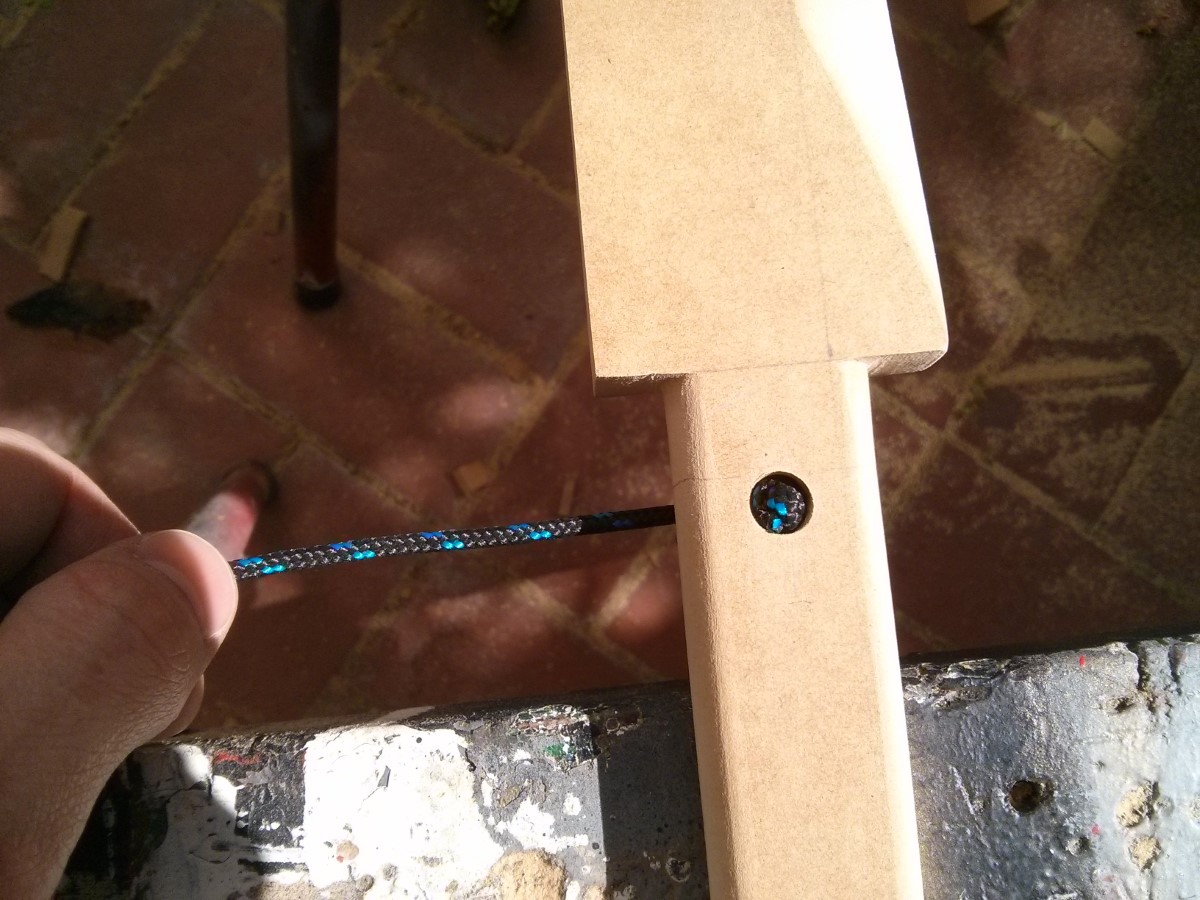
My plan was to wrap the hilt in cord. This would start at the top of the hilt like so. That part's easy, but I needed a way to secure the end of the cord, preferably in a hidden way, and that's not so easy. I also wanted to be able to replace the cord if it ever got frayed or too dirty. So I came up with a design where I could secure it under the pommel. This is the part of the sword build I'm most proud of.
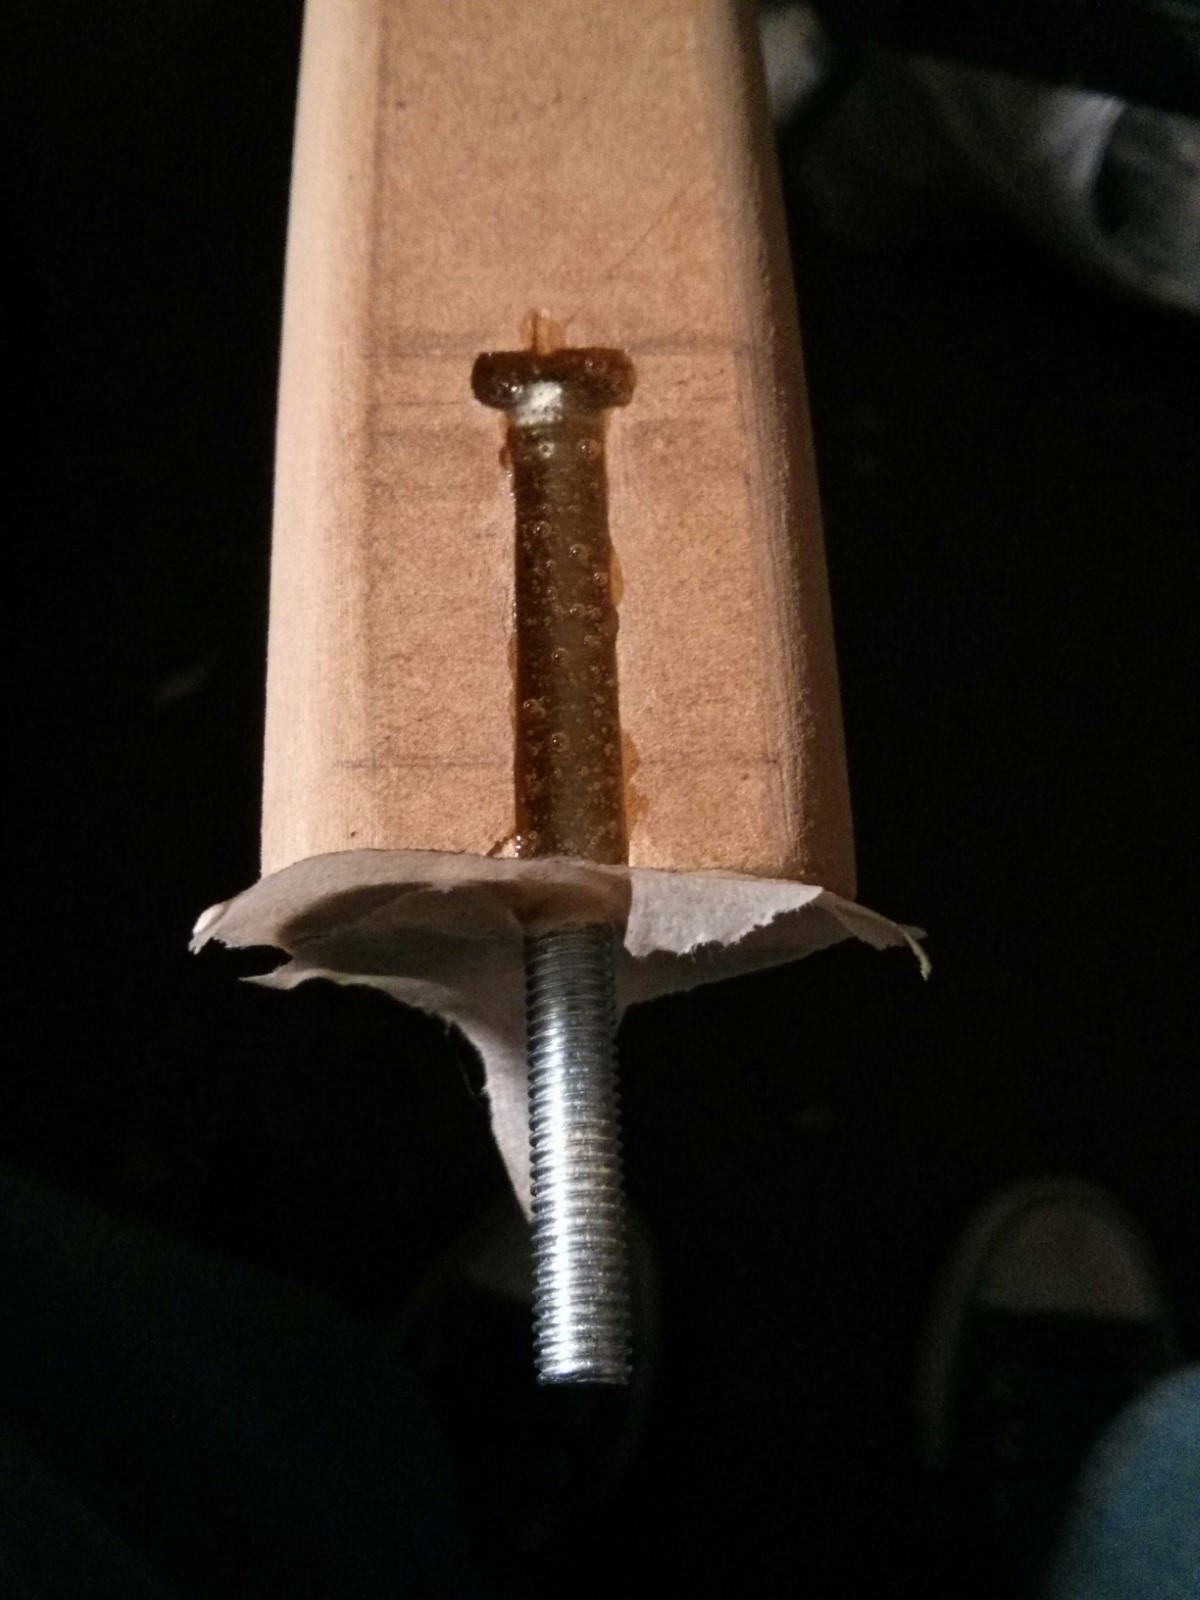
First I cut a slot in the hilt that would fit a bolt. The bolt is just long enough that I could put a dome nut on the end to secure the hilt in place:
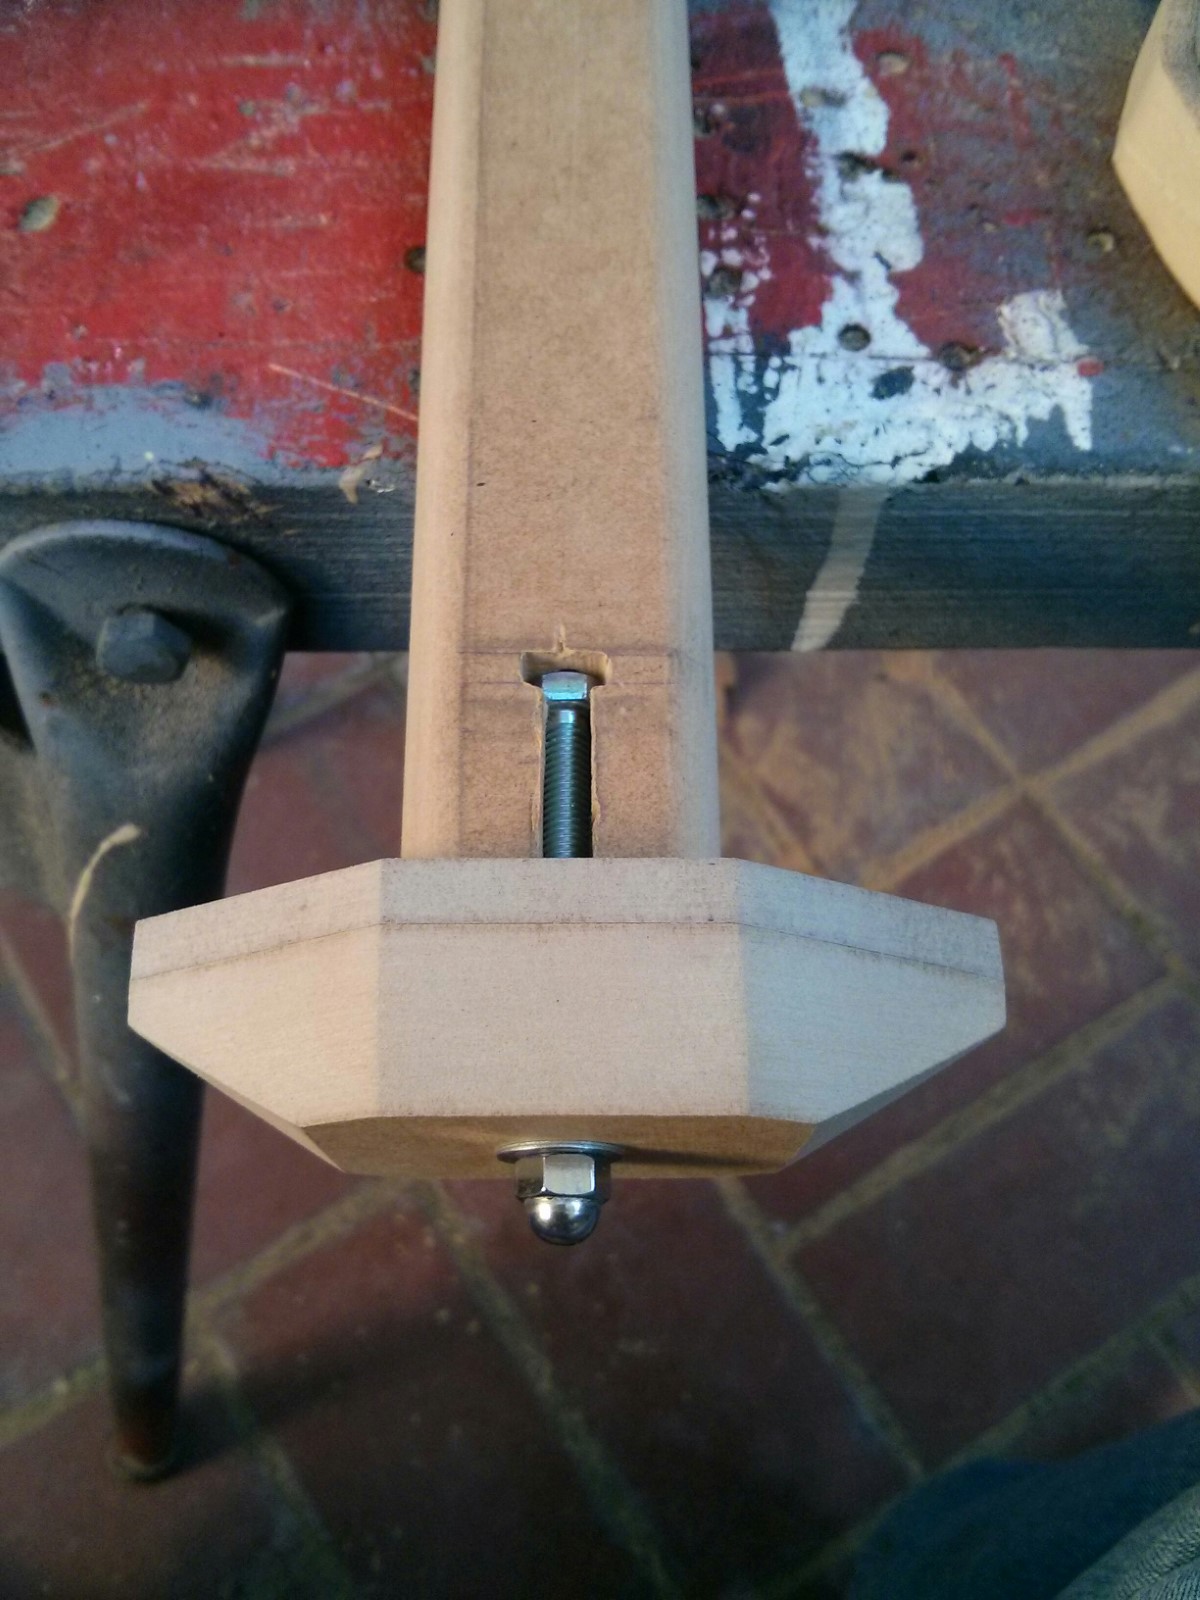
Where the pommel sits against the end of the hilt, there's a cavity where another nut can secure the end of the cord. After confirming that it all fit together properly, I filled in the slot around the bolt with epoxy resin.
Painting
I got to work painting the blade using spraypaint a purpose-built stand, and the guard and pommel on their own crude stands. Getting a nice glossy finish with spraypaint on MDF isn't the easiest thing, but it's possible with lots of coats, with lots of sanding in between.
I went with red for the guard and pommel, mainly because I had red spraypaint left over from the axe bass build. And a single coat of black on the hilt, in case there were any gaps after wrapping it in the cord.
Wrapping the hilt
This took about half an hour. I had to be careful to keep it in tension the whole time so there would be no slack
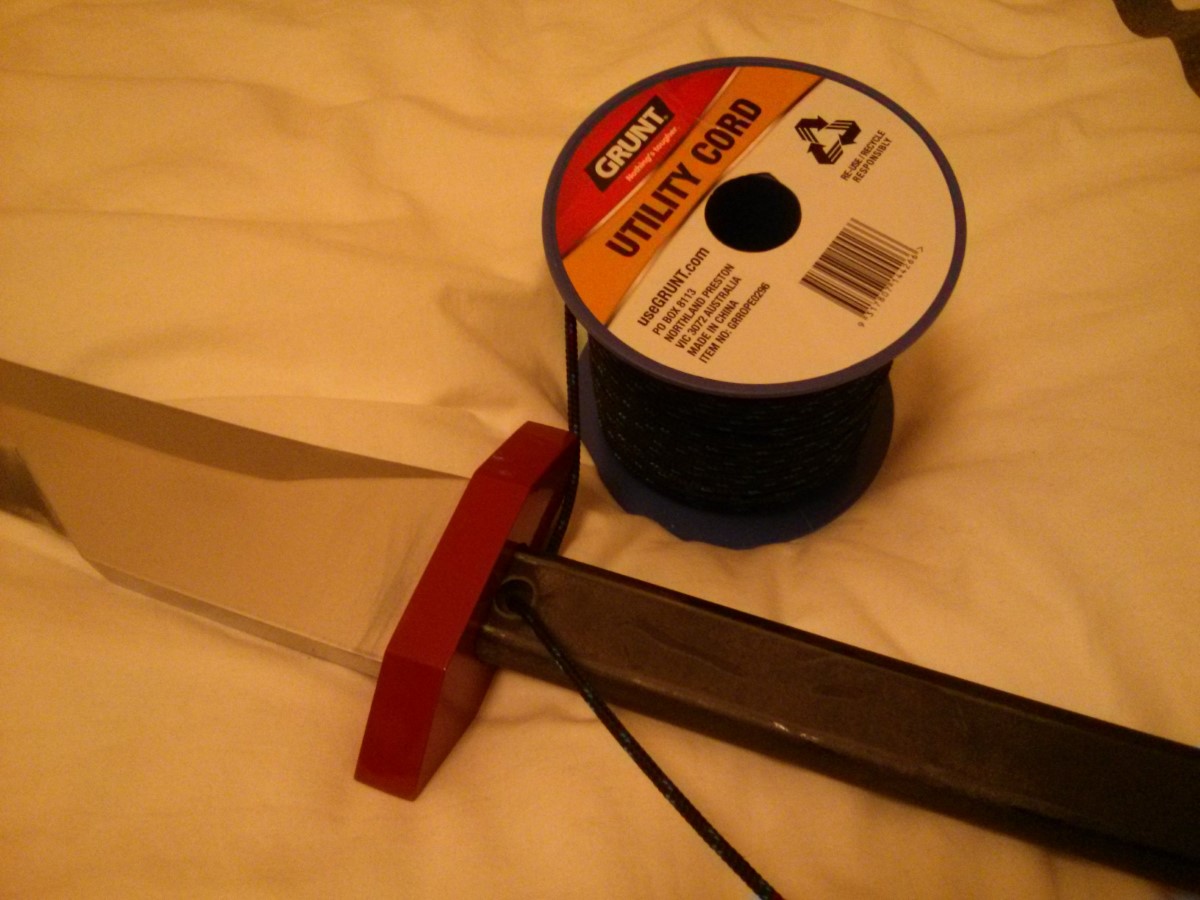
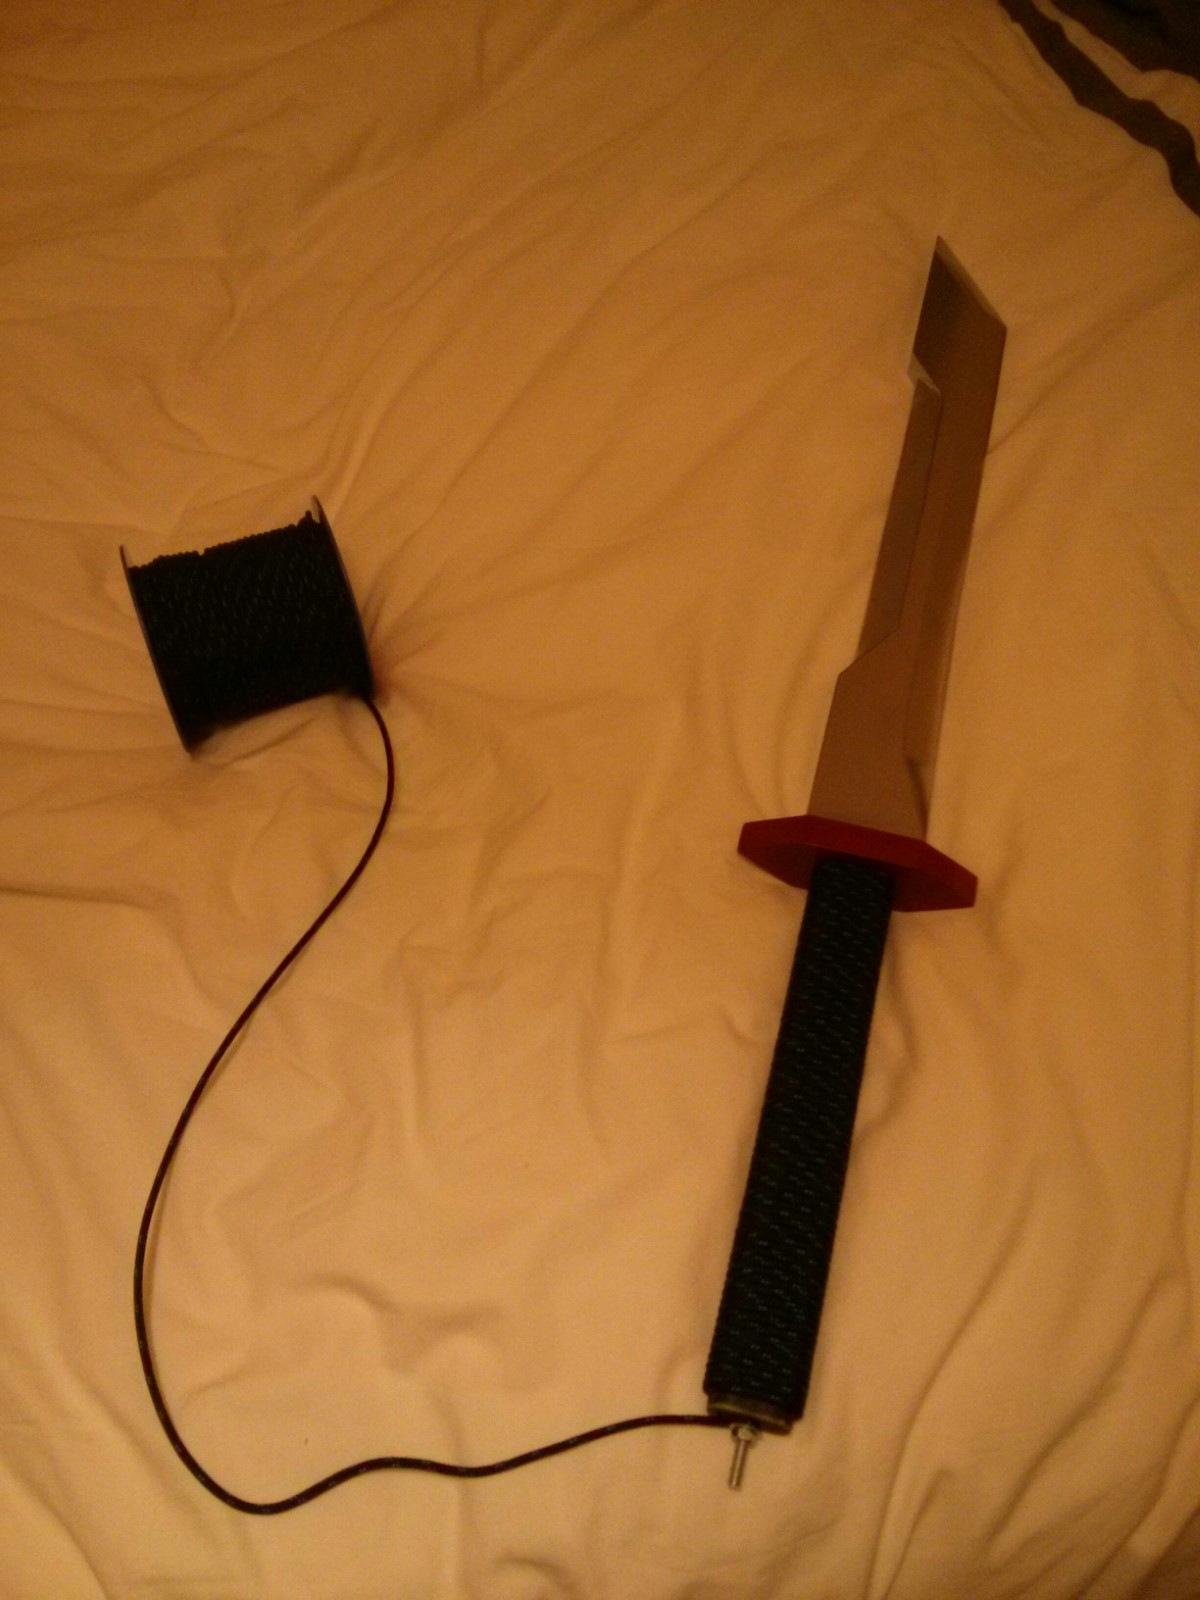
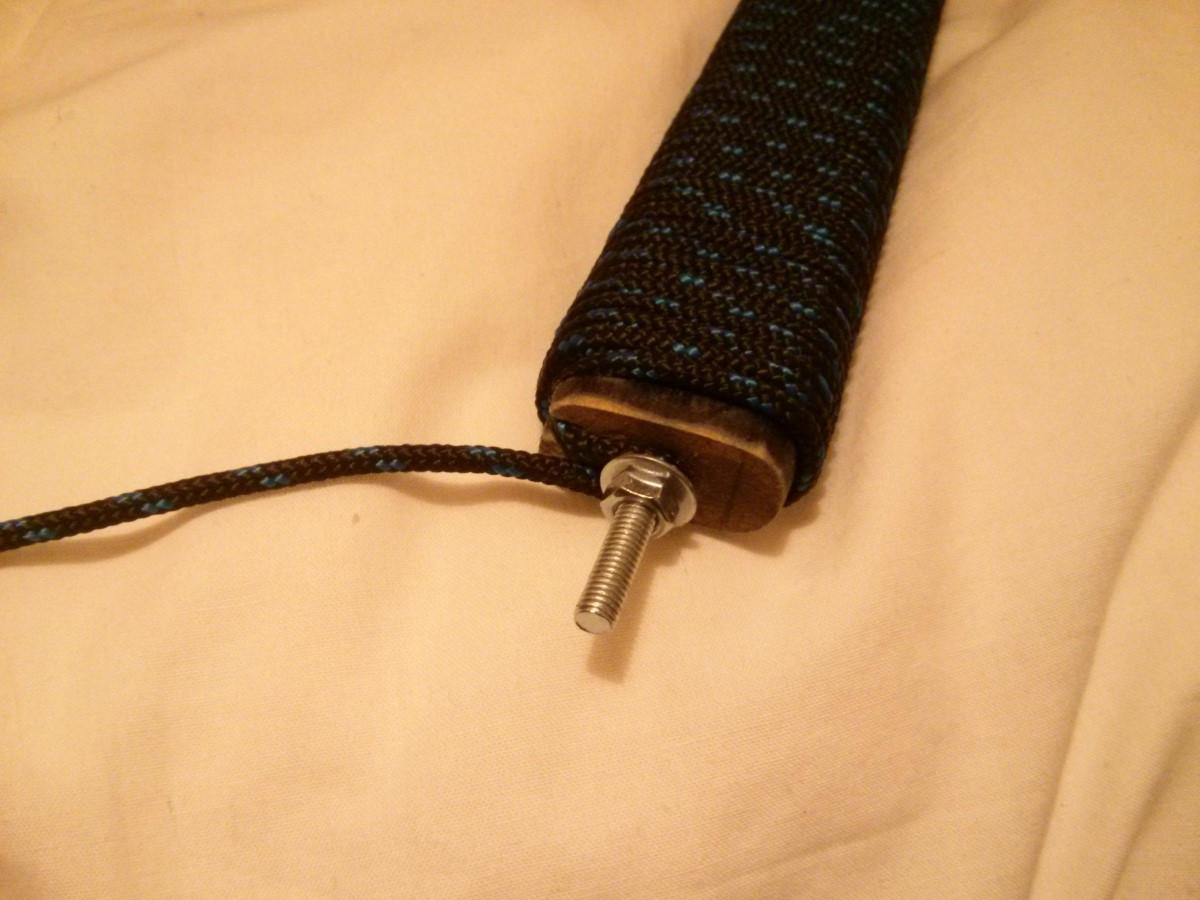
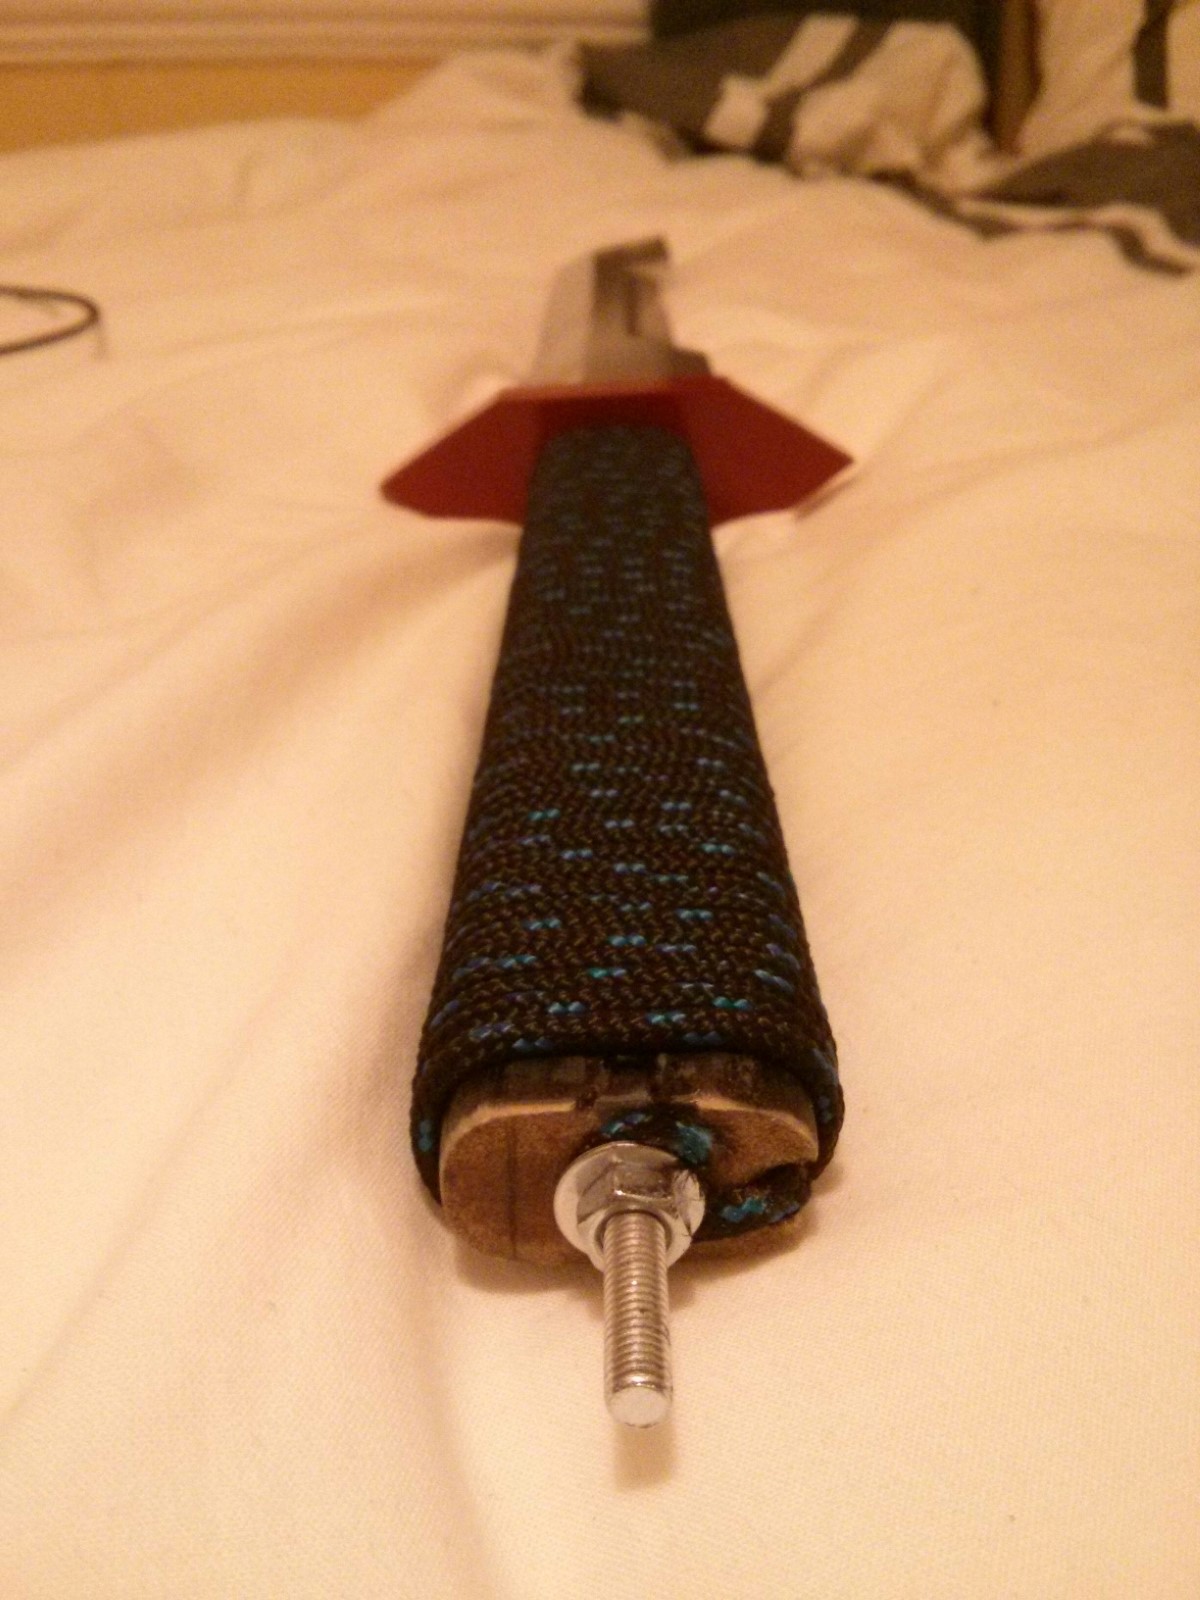
All that was left then was to secure the cord around the bolt, cut off the excess and attach the pommel.
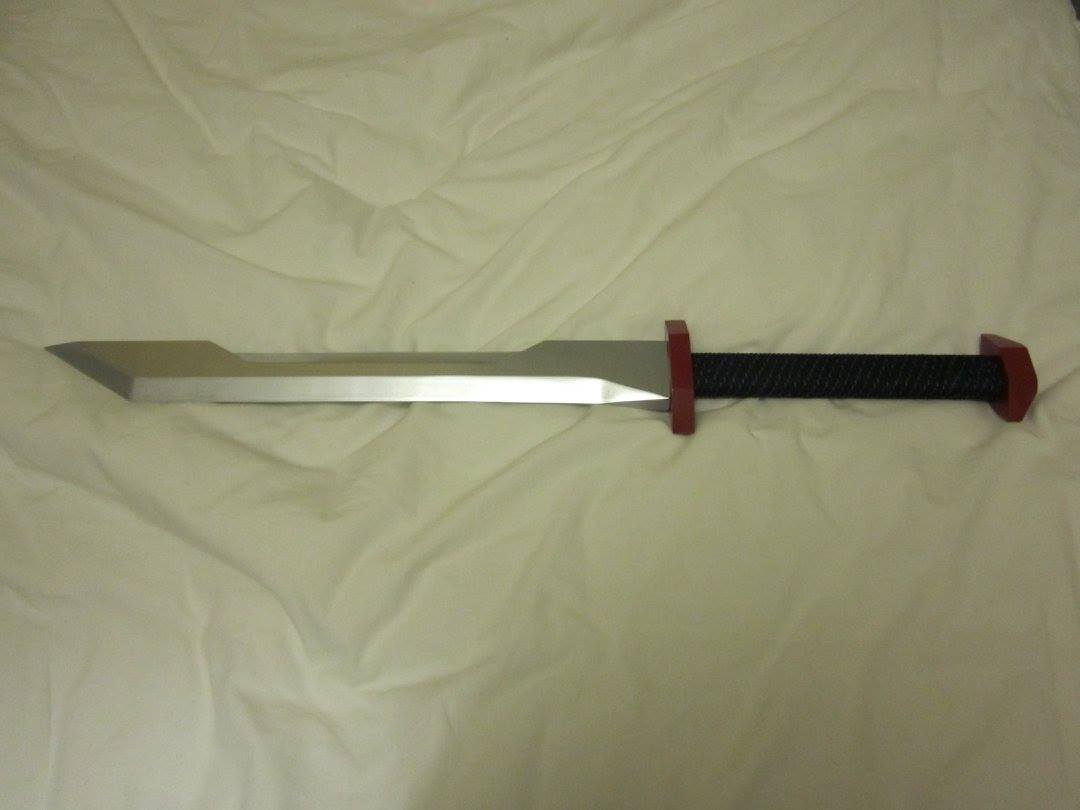
Finished sword